Saturday, 3 January 2015

Commodore IEEE-488 Disk Drives

This is an old post, preserved for reference.
The products and services mentioned within are no longer available.

I've been working on some Commodore PET disk drives recently. These differ from the Commodore 64 era drives in that they have a parallel interface, conforming to the IEEE-488 / GPIB standard. The later drives have a slower serial version of this on the 6 pin IEC connector.
I have a Commodore PET 8032 connecting to a Commodore 8250 dual disk drive. I haven't had much success here, and it's one of those situations where when it's all put together, it doesn't work. No response from the drive. I tried the standard LOAD "$",8, the DIRECTORY command and shift + run/stop.
I get just get device not present errors. So it could be the drive or the computer. The drive does do it's power on seek and the LED does go green, so the drive seem OK. The Pet is also otherwise OK.
I normally approach those sort of things with a divide and conquer approach and try to split the problem down each time, so is it the drive or the computer? Both started in poor condition, the PET's have been restored, but the 8250 is in progress, so it could be either. I don't have another drive to test, so lets try with a different PET. This is the 4032 I restored last year.
The 4032 gives different errors, and the drive seems to respond. The activity LED does light go red, but it still gives errors. It also response to ID=8, but not others.
So what next? Well since the 4032 got a response and the 8032 didn't, I guess there is a problem with the GPIB port on the 8032. I tried different 6522 / 6520s in the interface chip, but that didn't make any difference. There are three MC3446 buffers, but there aren't socketed and I don't have any spares to hand. I also didn't have another drive in any better condition to try, but I did remember reading about a way to convert a 1541 serial drive into a GPIB drive, similar to the 2031 LP.
The 2031 LP was basically a 1541 with a different board. It is possible to adapt the 1541 with a plug in board and a patched ROM. This was documented in a German C64 magazine in the 1980s. I'll go into more details at a later date.
The board I made plugs into the socket for the 6522 that handles I/O and bypasses the connections to the IEC ports. These are buffered by 75160 and 75161 chips and connect to the GPIB port. The upper ROM of the 1541 is modified. Here I've temporarily used a 24-28 pin adapter and a 2764 EPROM. I've used a GPIB connector on a ribbon cable, so that once it's sorted, I can desolder the two 6 pin DIN connectors and enlarge the holes on the case slightly to take the new connector. I have a drive which has had a bodged repair on the 7406 that buffers the IEC, so that will be the final target. For the moment I'm using a known working drive.
The modified 1541 powers up and spins the drive, more briefly than it used to, but otherwise looks ready to go. Unfortunately, I got no response from the 8032 and the light flashing, but no response on the 4032, exactly the same as with the 8250.
So either both drives are faulty, or both Pets, or something else. The cable is a bit of a bodge, using the extender cable from an 8032-SK, but seems to be fine. I will get around to making up a better one, but I think it's ok.I don't have much else that uses GPIB, various bits of test equipment, but nothing that I could use in this system.
Previously, I build a USB-IEC adapter to connect to serial drives from a PC. That was based on xum1541, and that does have the option to connect to GPIB drives. Rather than modify the previous one, I built a new USB to IEEE-4888 adapter.
I built that with the connector on the box, so it plugs directly into the connector on the back of the drive. Testing with the modified 1541 returned success, giving the model as 2031, which is what the 1541 has become.
Testing with CBMXfer, I did get a full directory listing, so there cannot be much wrong with the setup.
However, it was intermittent, it would work once then lock up. Going back to the command line CBMCtrl, I get various responses to DIR, but it's not consistent. Resetting the drive helps, but then fails again - not sure what's the problem here.
OK, so it's the drives then? I tried various options, another known working 1541 and a ROM/RAM board to rule out my EPROM adapter and the onboard RAM.
That made no difference. This was getting annoying. Nothing seemed to be working properly.
I thought I may as well try the 8250 as well, and rather unexpectedly, it worked, and continued to work.
I was able to format a disk and transfer some files back and forth using CBMXfer. So at last I have a working combination.
Going back to the PETs with the formatted and populated disk and the now known working drive still gave a fail. So both PETs and the modified 1541 are not working, but the USB - IEEE488 adapter and the 8250 are working, at least well enough to talk to each other. At least that's a start and with those working, I can get on with fixing the others.

Monday, 29 December 2014

Commodore PET 8032 Update

This is an old post, preserved for reference.
The products and services mentioned within are no longer available.

Just a quick update on the Commodore PET 8032 Restoration. It's been generally working well, but I've had occasional problems powering up.  It would beep, but show nothing on the screen. No video signal, but everything else working, no response to blind tape commands. I finally traced this to the BASIC ROM set, with the editor and kernal working fine as it beeps, but the BASIC interpreter not starting.
I tried replacing the ROM chip with an EPROM, which worked a few times, but then had the same startup problem.
Pushing the top socket (UD9) one way or the other and then turning the power back on did seem to fix it. The board has the older style white IC sockets, which are sometimes problematic.
Technically, replacing it with a turned pin socket would be a better solution, but for historic and asthetic reasons, I wanted to keep the old style sockets. I could have used one of the two option ROM sockets, but again, that wouldn't look right. I could replace all of them, and may go down that route if there are any further reliability issues.
There is another white 24 pin socket on the board, the one for the character ROM,  UA3. That is at the other side of the board, below the DRAM chips. Half of the DRAM had failed and been removed and replaced with black turned pin sockets.
I removed the socket and replaced it with a black turned pin one. That tidied up that side of the board and provided a donor socket for the BASIC ROM.
With that replaced, it seems to start up with out a problem now.
Time will tell if this has fixed the issue.

2022 Update: This PET is still working well, no further problems with the ROM sockets.

Tuesday, 9 December 2014

Commodore PET 8032 Repair and Restoration

This is an old post, preserved for reference.
The products and services mentioned within are no longer available.

Oh dear, here we go again. Hopefully this won't take as long as my previous Commodore PET 4032 restoration.
This is a Commodore CBM Model 8032, from around 1980/1981. The model is given as 8032-32 B. That is 80 column, 32K, business keyboard.
It is the earlier version of the 8032 with the larger section between the monitor and keyboard. This ebay score appears to have been used for spares, many of the parts are not fixed down, and at least the main board is not the original.
The board is not bolted down, and is the later universal 40 or 80 column, 16K or 32K board, dating from 1983. It is also not working. I will fix this board later.
For the moment, I have another ebay score, an 8032 board form late 1980.
This is the style of board which would have originally been fitted. It was also faulty, but I repaired it in preparation for this.
The transformer is the right type, but not bolted down, and it looks like the monitor lead has been reconnected at some point, and the attached capacitor wasn't clipped down. So this may well not be the original.
The capacitor is marked as being made in West Germany, where as the serial number sticker on the back of the case is marked made in the USA. Pets were built in both locations, so I suspect the power supply came from a German produced unit. The capacitor was rattling around loose and is a bit dented. It should be 22000uF, with had a stated tolerance of 0/+50%. It is now reading 29830uF, still well in spec and low ESR. Not bad for a 35 year old part (far better than modern capacitors which tend to be one of the main causes of failure of consumer electronics these days).
The power connector is a bit mangled, it looks like someone has tried to fix it by squashing the wires down. Given the damage to that, I have replaced the plug.
A useful tip in this situation is to do this one wire at a time, to minimise the chance of making a mistake. Pin three is left blank for polarisation.
I'm assuming the monitor and keyboard are original, as all the screws are all present and tight. The monitor is an earlier version to the one in the 4032 and 8032SK, but required less clean up that the 4032 monitor.
There were a few issues with the monitor. it was out of adjustment, over bright and the vertical hold had slipped.
The text on the screen was intermittent, down to a dry joint on the video connector. With that fixed, and the monitor adjusted, it was working fine.
The keyboard wasn't too bad, about 90% of the keys were working, but I still went for the full strip down and clean up as with the 4032 keyboard.
As usual, the keycaps were removed and washed, and the PCB cleaned and reassembled.
All keys were working again, a bit yellowed, but fine.
The base cleaned up quite nicely, no need for a respray this time.
The power supply and board were installed and tested. All working well.
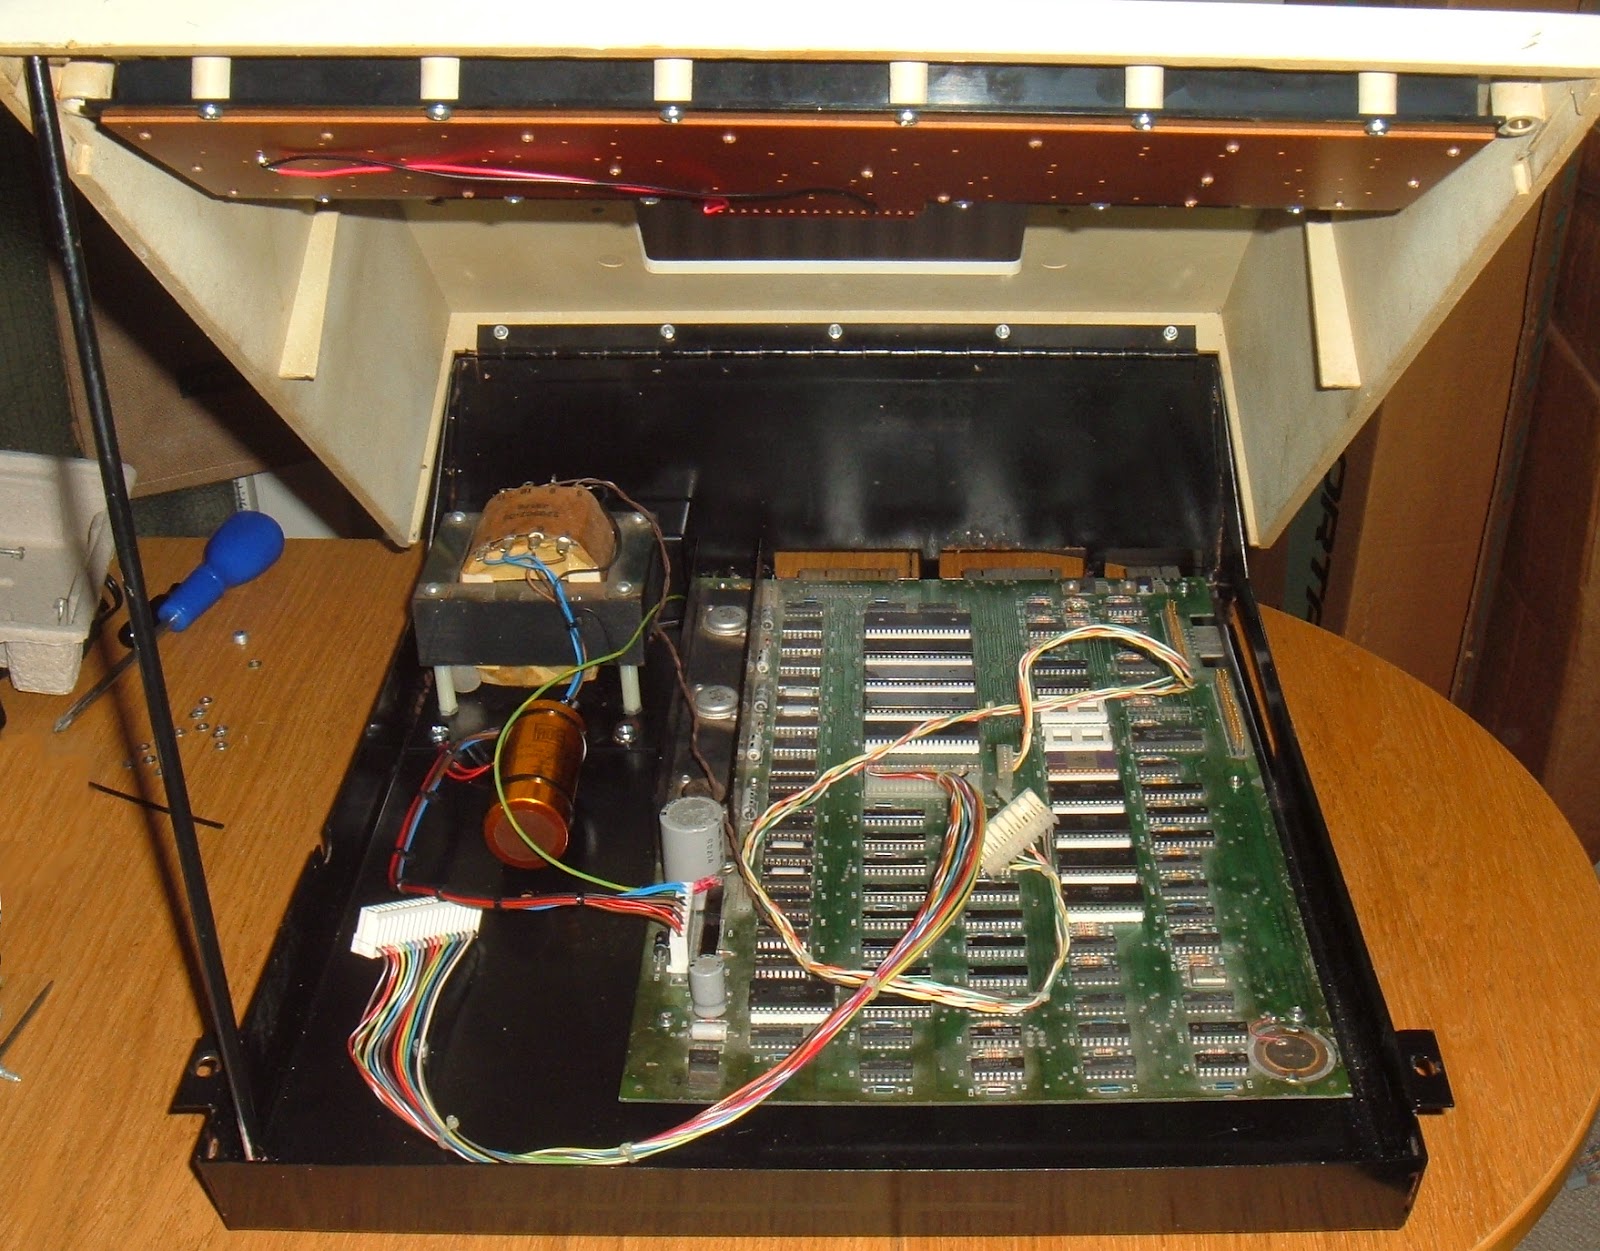
The upper case was a bit dirty, but cleaned up. From inside, you can see the extra space in this model hides two slots that look like they could have been for dual floppy drives, but they aren't the right size.
The cleaned case was reassembled with the piano hinge and bonet prop.
I'm replacing fixing where they are missing or tarnished, and cleaning up as I go.
The monitor was reinstalled and the whole setup tested together. After a few runs of memory testing and a long soak test, it's working very well.
So there is another computer restored. Quite a few faults in this one, the monitor out of adjustment and with a few dry joints. The keyboard needing cleaning to get a few keys working. The power supply plug mangled, and the mainboard faulty (to be repaired later).
Here you can see the differences between the 8032 on the left and the 4032 I previously restored, on the right. The the higher monitor stand, the business vs graphics keyboard and the 80 vs 40 character screens. I have to say I prefer the white coloured monitor bezel on the 4032, but they are both very nice machines.
Inside, the different transformers and boards can be seen, and the higher back on the older unit.

Now all I need to do is get a PET 2001 (and a bigger bench)....

Saturday, 6 December 2014

Commodore 8032 Main Board Repair #2

This is an old post, preserved for reference.
The products and services mentioned within are no longer available.

Here is another Commodore CBM 8032 board to be repaired. This one is slightly later than the previous 8032 board I repaired, but earlier than the universal dynamic PET board in the long running 4032 restoration saga.
Like the other early board, it is 80 columns only, but jumpered for 16 or 32K. A few other differences from the later boards. There are three voltage regulators, two 7805 and one 7812. Later they dispensed with the two 7805s (5V @ 1A each) and replaced them with a single LM323K (5V @ 3A).
The earlier board had gold plating on all three rear edge connectors, but not the side datasette 2 connector. This one like the remainder of the PET boards has gold plated IEE488 / GPIB connector and the rest solder tinned. There is also space for a pin header for the GPIB port. It was populated on the earlier board. Here it isn't, and in later boards it was removed altogether. These earlier boards had the cassette transistors riveted down. Later boards they are left floating in the air.
They also tend to have white sockets on the ROMs and the five main chips. Being white it stands out even more that all five 40 pin chips are all missing. The ROMs are present, and there is a ceramic version of the later 901465-23 BASIC 4.0 ROM.
As you will see from the keyboard and video connectors above, it is not in the best of condition, most of the pins are bent.
It does however, have the same symptoms. Nothing on the screen. No beep.
Obviously one reason it doesn't beep is the piezo disc is missing, but it's probably a lot more than that.
The RAM is made up of 16 ceramic MM5290J-4 4116 clones. These had very long legs which were all mangled and shorting on the rear. Forgot to take pictures of those, but I did clip them all short. The lid of one of the chips was rattling around in the bag when it arrived. All of the bits must have all fallen out.
When I desoldered the chip, all the legs just fell off and left the die and the bottom of the case
The first job was to tidy up all the pins and replace the piezo and the damaged DRAM chip. Powering on with all the chips removed passed, so no problems with voltage or shorts on board. .
Next, a working set of 40 pin chips, from left to right, 6520 (GPIB PIA), 6522 (VIA), 6502 (CPU), 6545 (CRTC), 6520 (Keyboard PIA). After testing, the 6520's were replaced with new WDC 65C21N's, and the 6522 with a new 65C22N.
Time for the ROM / RAM replacement board. That booted fine, but failed with either onboard ROM or RAM enaabled. Some of the DRAM chips were getting very hot, particularly the bottom few, so I started to replace those.
It was at that point that I found that more of the DRAM chips were falling apart. The lids just peeled off. Eventually all of the lower 8 chips fell apart. The top 8 were seemingly intact.
Inside, 16384 bits of DRAM. You can just see a few loose bonding wires in the way.
With those replaced, the RAM tests passed.
The ROMs were next. I'd found the monitor ROM 091474-04 was also hot and not working. Replacing that, the ROMS were fine, and the ROM/RAM board could be removed.
That's complete and has been on soak for a few days with no problems. Another one back in service. I have something lined up for this board in the coming weeks.

Update: This board has now found it's new home in an early 8032.