This is an old post, preserved for reference.
The products and services mentioned within are no longer available.
This is the eighth part of the repair and restoration of a Commodore Pet 4032, you might want to start way back at
Part 1. The story so far, an 8032 board has repaired and converted to a 4032. I am now in the process of putting it all together. The keyboard needs a bit of a clean.
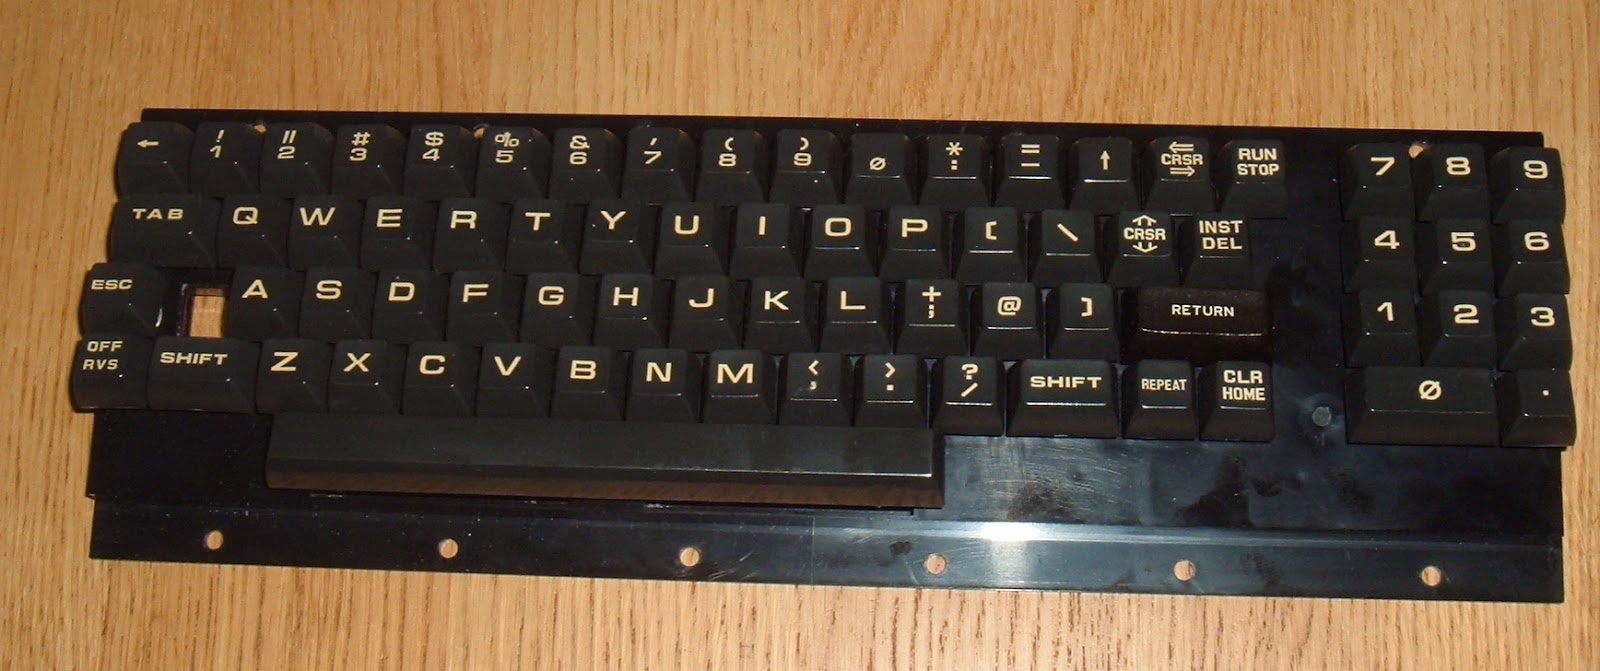
This is the keyboard as is. It is the 'N' for Normal or Graphics keyboard. Notable for the lack of numbers on the top row. Most of the keys are working, but some need a bit of extra pressure and a couple aren't working at all. This is a common problem with the sort of keyboards. The repair procedure is fairly simple, but is a bit tedious and repetitive. So for some reason, I've decided to tackle two of them at once
This second one is from an 8032-SK. This is the 'B' for Business Keyboard. The case is pretty bad, but the keyboard look like it will clean up ok apart from the missing return key. This layout is more normal with numbers on the top row and the smaller numeric keypad, and shift used for symbols.
Step one is to remove the rear PCB, to do this, the connections to the shift lock switch need to be desoldered
Once that is done, and 30 small screws removed, the PCB can be removed.
All this needs is a bit of contact cleaner. Next is to remove the keys. For this I use a key puller.
This slides down the sides of the keys, then you twist it 45 degrees and can safely extract the key vertically without damaging it or it's neighbours.
From the back, you can see how the plungers fit into the frame.
This is the tedious bit as each one needs to be carefully removed without loosing the spring.
Each one is made up of 4 parts, a spring to hold the key up when not pressed, a plunger with a carbon pad on the end to make the contact on the PCB when it is pressed, an adapter which plugs into the plunger, and the keycap itself. Some of the keys come off with the adapters intact, others separate. I don't normally split the intact ones.
These are separated, and the keycaps washed.
A nice clean set of keycaps.
And a cleaned chassis. Now, all that remains is the task of slowly putting all the keys back. You could arrange the keys in the correct order (you did take a photo of how they were arranged before you started right?) and put them in one by one. I prefer the riskier and more exiting pick a random key out of the box, and work out where it goes.
So far I haven't made any mistakes.
Although the letter O and zero keys threw me a bit. It's only on the sides they look different.
Once that's all done, double check they are all in the right place.
Then it's back on with the PCB and resolder the shift lock switch. Plug it into the pet and test the keys.
The procedure for the B keyboard was the same, apart from the return key. When I got it, the plunger was there, but the return key and adapter where missing, I looked through my spares, but didn't have anything suitable. These Pet keyboards are the only ones I have with these sort of stems on the keys.
The closest looking key I found was a BBC Micro Return key. This was the right size and colour - it looks a different colour under the camera flash, but to the naked eye, it looks fine. Here compared to the zero key from the keypad which is the right shape and size.
Here I've used the plunger from a Commodore 64 keyboard which has the same cross pattern at the top as the BBC, and was about the same angle from the top of the key.
With that cut down and the slot filed in, it looks a reasonable match.
In place it works rather well, the flash again making it look grey versus brown.
Better without the flash. Not perfect, but perfectly usable.
So that's two keyboards cleaned and ready to go. Now I need to sort out
the case of the 4032...
Update: I've built some USB keyboard adapters to make testing easier -
Commodore PET USB keyboard / Keyboard testers