Sunday 1 November 2020

Mini PET Perspex Case

This is an old post, preserved for reference.
The products and services mentioned within are no longer available.

We have updated the Mini PET kit options to include a Perspex case kit.
As soon as the Mini PET was launched, people started asking about cases. There were lots of people saying they would like one, and lots of people saying they were going to design a 3D printed one. I sent out dimension drawings and 3D models to various people, although I had to graciously decline the offers of 'send me a free kit and I'll design you a case'.
This one has been designed by Mr RC2014, and is available from his Tindie store, and now also as an option when ordering a Mini PET kit from the Future Was 8 bit (https://www.thefuturewas8bit.com/shop/tynemouth-products.html).
The kit includes two laser cut pieces of Perspex and a fixings kit. 
There is a blue baseplate which screws to the pillars on the bottom of the Mini PET mainboard and keyboard. Note this is not symmetrical as the keyboard includes mounting holes to match the original PET keyboard were the top row of holes was not symmetrical. Make sure all the holes are lined up before you start putting in all the screws.
The 10mm pillars sit between the main PCBs and the base plate. There are 8mm pillars to go between the main PCB and the keyboard overlay PCB, and 10mm pillars between the main PCB and the top plate.
The fixings kit is used in addition to the fixings supplied with the Mini PET mainboard and the keyboard kits. As well as the nylon pillars and feet, this kit also includes two tall tactile switches to replace the standard ones in the Mini PET kit, to allow them to be pressed once the top plate is in place.
The top clear plate covers the mainboard and includes holes to access those switches and the DIP switches, and also has holes to let the sound of the space invaders escape their new acrylic home.
The top plate also includes cut outs for the two taller connectors (power and video), as well as engraved legends for all the external connectors.
Mini PET kits are available from The Future Was 8 bit (https://www.thefuturewas8bit.com/shop/tynemouth-products/mini-pet.html)
You now have a choice of the getting the Mini PET without a keyboard (if you are using an original keyboard or one of the cherry switch versions). Or you can order with the deluxe keyboard.
Or, you can order the kit with the deluxe keyboard and this Perspex case kit. (all versions now come with the TFW8b 9V power supply)
If you are replacing the mainboard in a PET, you need the internal version (Kit B). https://www.thefuturewas8bit.com/minipet-b.html
You can also get the Perspex case kits if you want to add a case to an existing Mini PET kit. Note the fixings kit supplied with those kits is different to the one included with the Mini PET kits as shown above. 
There is also a version available from there with a cutout slot at the front, which will suit all boards with the original 3+5 way DIP switches or the later ones with the single 8 way.


2022 Update: The Mini PET has been replaced by the Mini PET 40/80. This comes with the Perspex kit included, and has a built in much nicer keyboard and supports 40 and 80 column mode. Available now from The Future Was 8 bit.

Sunday 25 October 2020

RC2014 Mini CP/M Upgrade Kit

This is an old post, preserved for reference.
The products and services mentioned within are no longer available.

I have been investigating various Z80 CP/M machines recently, this is a nice simple one to get started with. This is a two board solution the RC2014 Mini and the RC2014 Mini CP/M upgrade kit.

The traditional RC2014 is a handy modular Z80 system (other CPUs are available, but I'll stick to Z80 today). CP/M (Control Program / Monitor) is a late 1970s precursor to DOS, and ran on many of the Z80 based systems until the mid 80s when MSDOS based PCs took over the world. There is a fascinating (possibly apocryphal) story of why the IBM PC shipped with MS DOS rather CP/M, which seems to come down to the representative of the more established CP/M who didn't think it was worth their time attending a meeting with IBM, and some young guys from a tiny company that grasped the opportunity and got the contract.
This is pretty much the minimal system you would need to run CP/M, five boards and a backplane. In this case:
  1. 64K RAM board
  2. Pageable ROM board
  3. Compact flash storage
  4. 5 slot backplate
  5. Z80 CPU, clock and reset
  6. Serial card (in this case 68B50 ACIA)
(and that is using my Z80 CPU card with built in clock, if you stick to official modules, you need a sixth board to provide a clock)
The new kit starts off with the already reduced RC2014 Mini. The Mini combines the Z80 CPU, a clock, 32K of RAM, 8K of non-pageable ROM and a 68B50 serial interface.
On it's own that is a nice little Z80 system that runs BASIC via a serial terminal.
This is arranged as 8K of ROM from 0000-1FFF, and 32K of RAM from 8000-FFFF. CP/M requires RAM from address 0000 upwards, normally the full 64K where possible. The RC2014 Mini has ROM fixed at that address, so the ROM chip has to go.
Now we come onto the new board. I like the packaging, a laser cut piece of cardboard protects the IC sockets in transit.
The new board is the same shape and size as the original RC2014 Mini, and is designed to sit on top of it.
This has a second 32K of RAM, which sits at 0000-7FFF, which gives the full 64K of RAM that we need. 
The Z80 boots from address 0000, so there needs to be a way to get CP/M loaded and running, and so there is a ROM chip which can be switched into that address range at boot time.
This boots to a monitor program from which you can load code over serial direct to RAM (which is only required if you are setting up your own compact flash card from scratch). There is also a menu option to boot BASIC. That doesn't work with the supplied ROM, but you can select the BASIC only ROM with the jumpers. (The hardware should support it, but it needs a version of BASIC compiled to run at 2000 and use the 68B50 ACIA)
When the X option is selected, code is copied from the CF card into the top of RAM, then the ROM is switched off leaving just RAM and CP/M is booted.
Once booted, you have access to the CF card as a selection of 8MB disks. A: contains only a download program, and C: has a selection of utilities. You can use download to transfer your favourite programs onto these disk images.
Such as the Infocom Hitch Hiker's Guide to the Galaxy or Zork.
And there is also a version of Microsoft BASIC
So that's the RC2014 Mini CP/M upgrade kit, a nice easy way to get a minimal CP/M system up and running.

2022 Update: RC2014 continues to be very popular, they can now be ordered from the sellers new store z80kits.com 

Sunday 20 September 2020

Mini PET Deluxe Keyboard

This is an old post, preserved for reference.
The products and services mentioned within are no longer available.

The Mini PET has been well received, but one thing appears to be unanimous, no one liked the keyboard. I think that was partly down to the blue switches TFW8b likes to use. The white soft touch ones I used originally were nicer to type on.
We have been working on a replacement for a long time. It has been difficult to get it looking right and being nice to type on, and also using parts we can source reliably and offer at a reasonable price.
The keyboard is supplied as a kit requiring assembly. Nothing complicated, but it will take a bit of time. As with my other kits, the switches are supplied already inserted into the PCB. This protects them during shipping and saves me having to count to 73 to check they are all there. 
It took a while to get these switches right. After trying lots of different types I settled on these soft touch tact switches from Osram. They are quite a bit more expensive than some of the others we looked at, but they are so much nicer to type on.
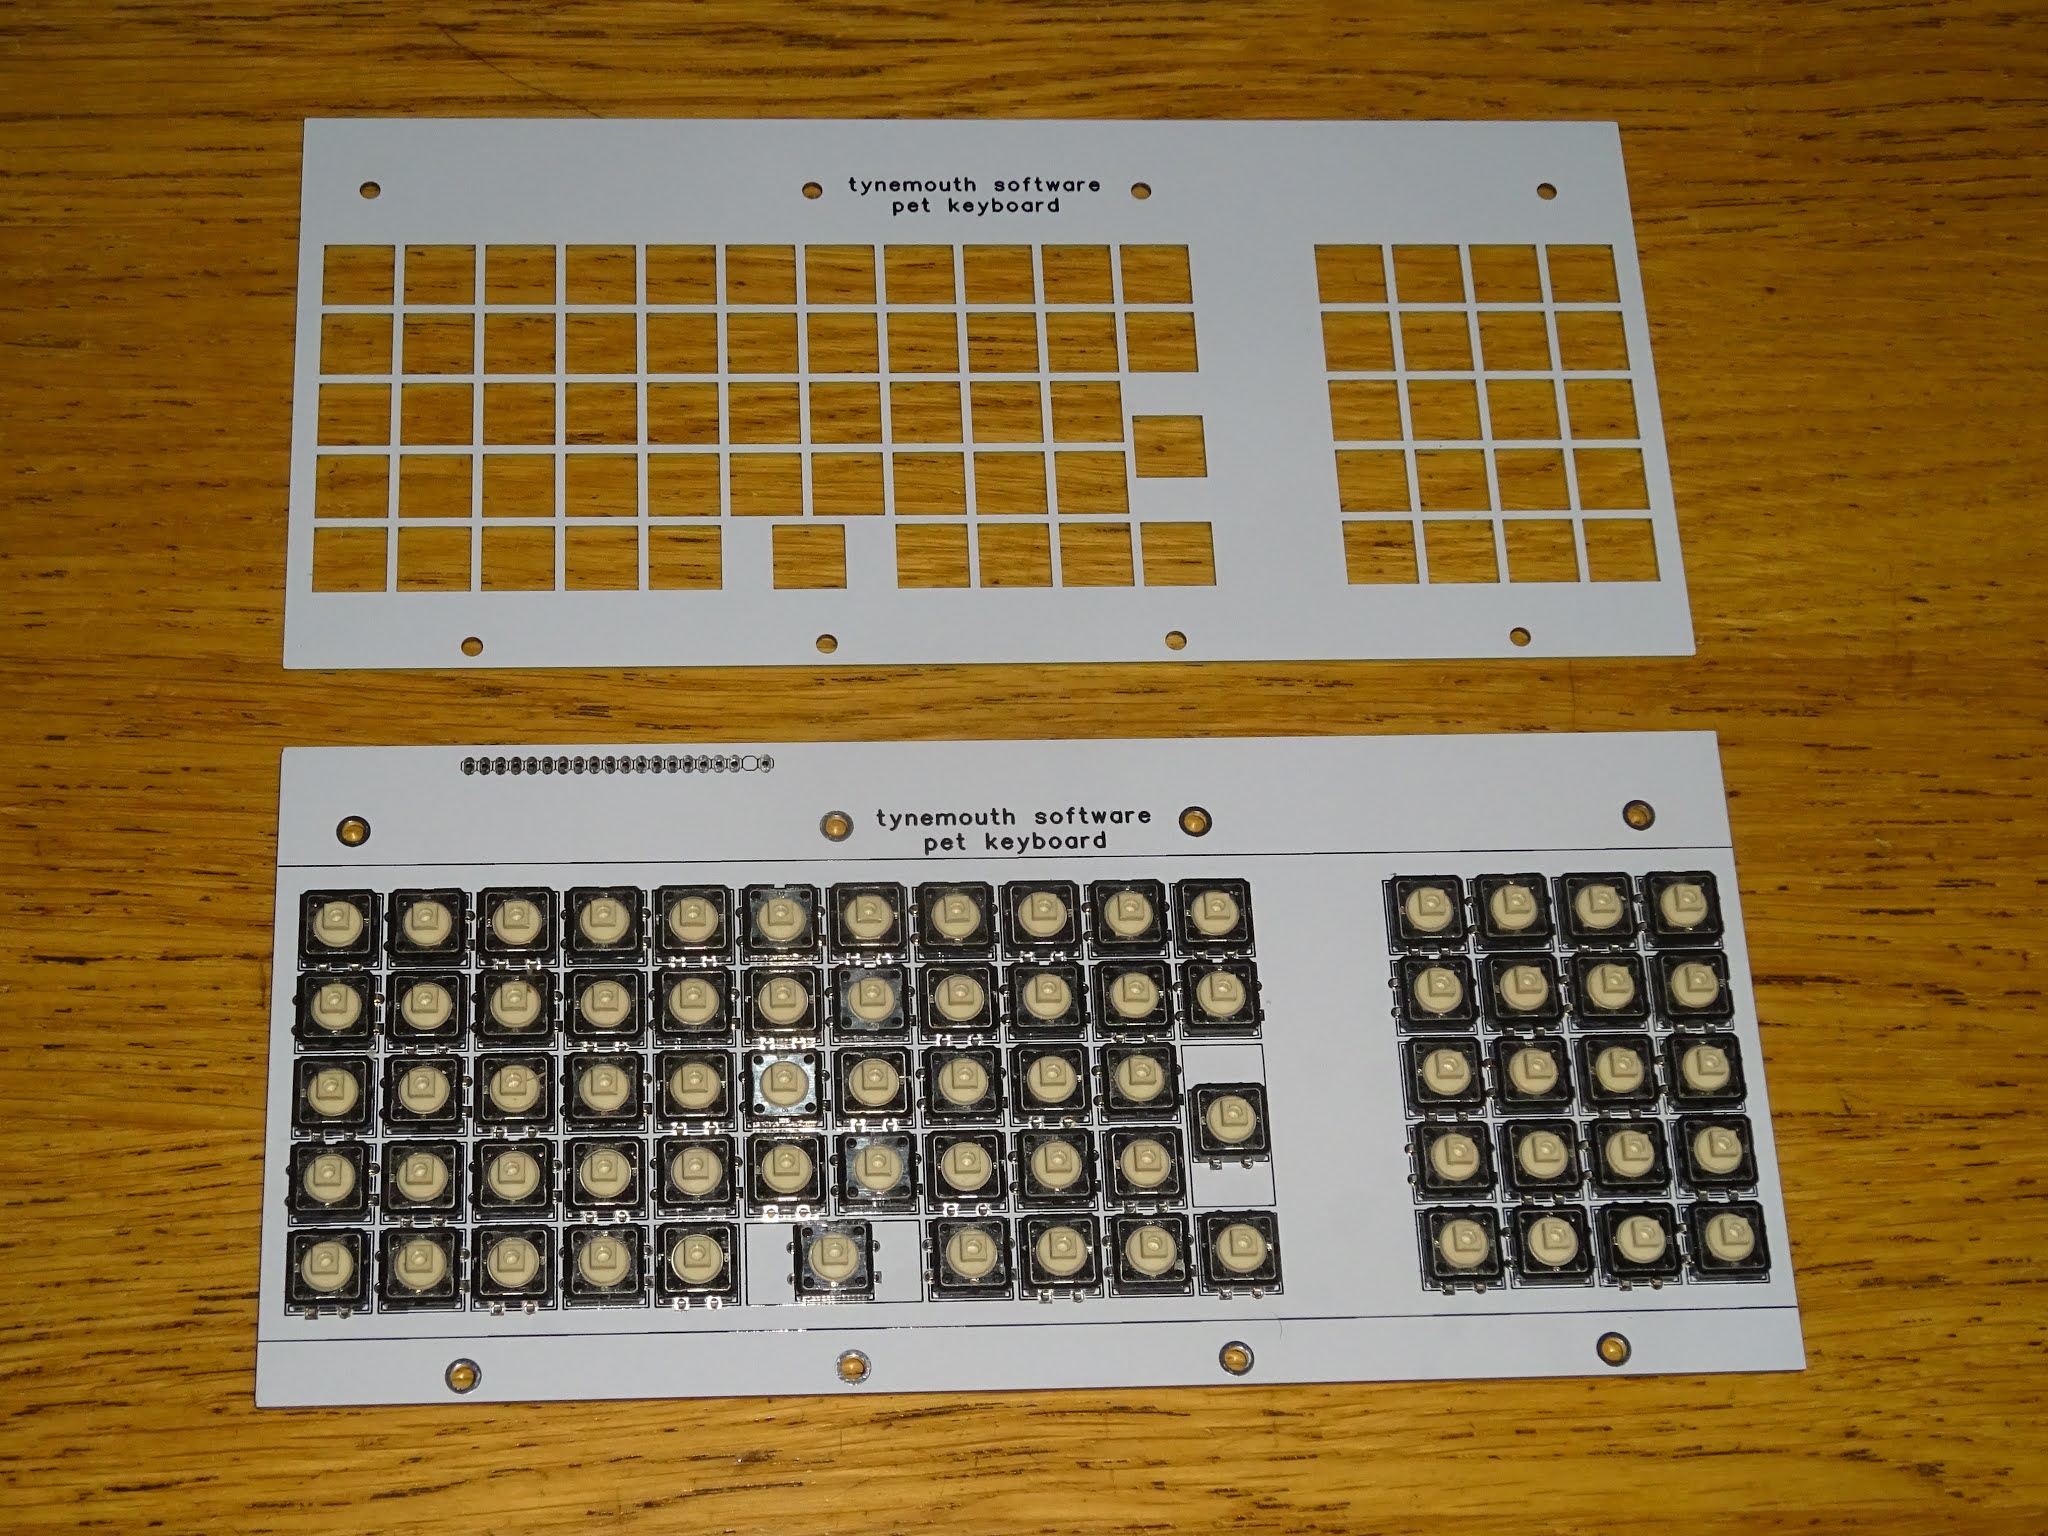
It might not be clear from that photo, but in order to fit the switches into the available space, they alternate in direction to avoid their leads clashing. You can see better on the unpopulated PCB.
There are actually two PCBs supplied, the second is a grid which sits above the main board and holds the switches in place.
The first job is to solder the switches in place. Then you can start on the keycaps.
These are in three parts, a white button, a paper insert and a clear cap. 
The paper inserts need to be cut from the sheet supplied. For the last month or so I have been finding these little bits of paper all over the place.
There are multiple copies of the keyboard on there in case you need a second go at cutting a particular key.
Fit the paper insert into the clear cover. If necessary, push it down flat at the corners. Then push the white cap into the clear cover.
And there you have a finished button. Only 72 more to go.
You can start fitting these to the keyboard, they should clip on to the top of the switches.
Now repeat that for the rest of the keyboard.
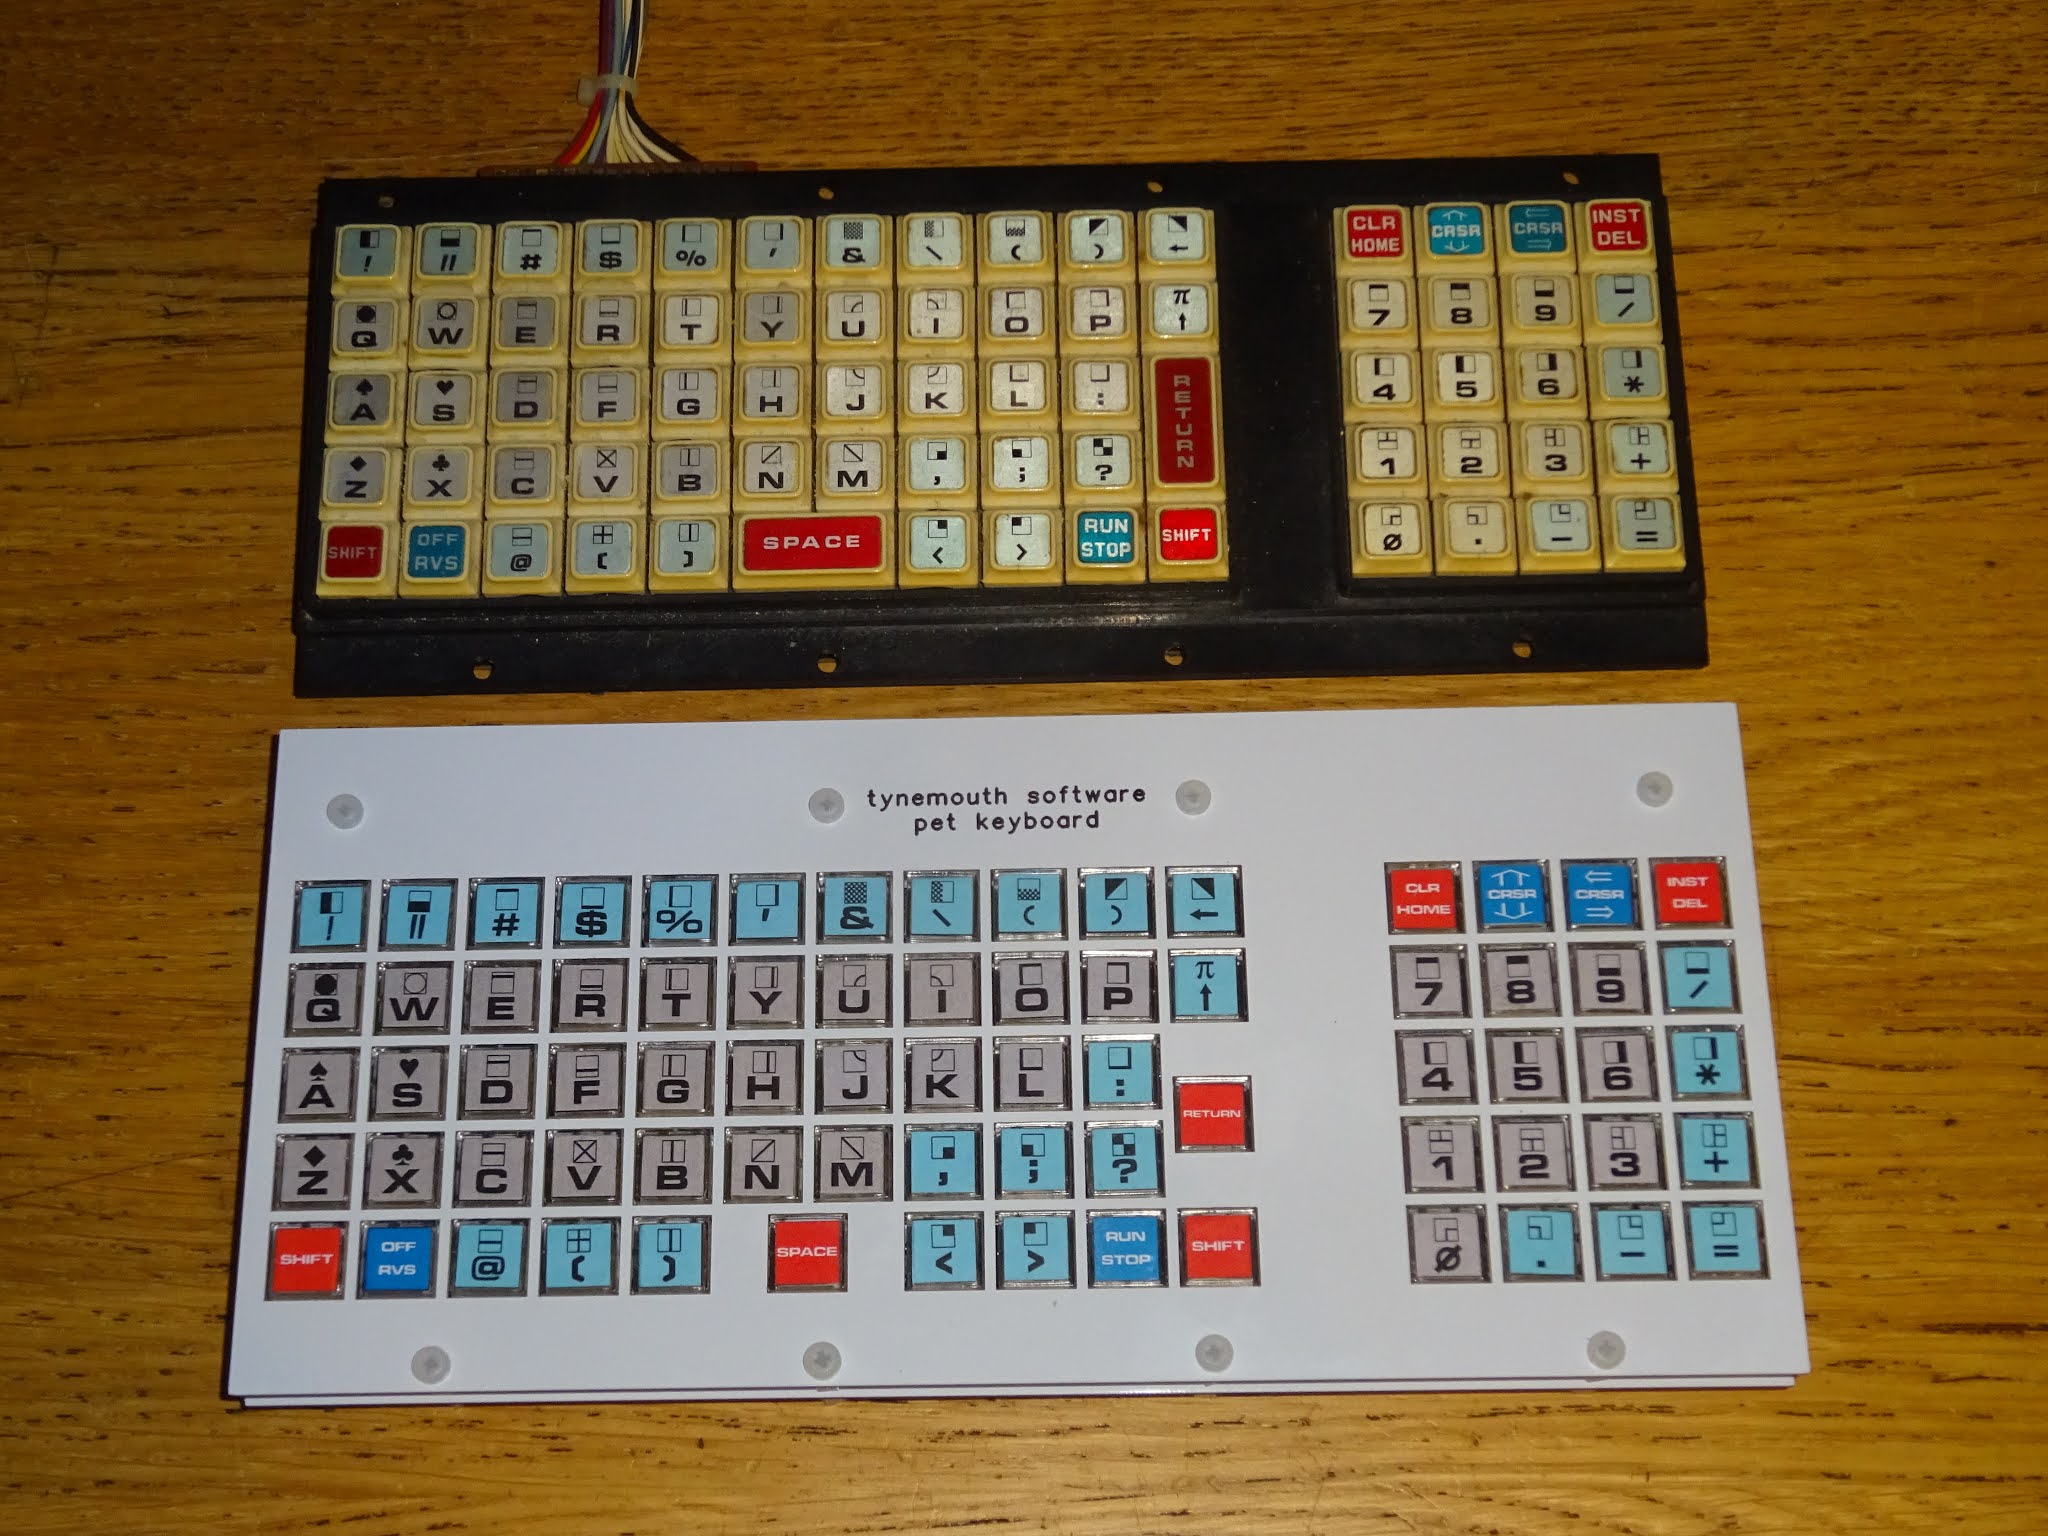
I have recreated the artwork as closely as I could based on the most common PET 2001 keyboards (I am told there are three variants one with different coloured number keys, and one with the light blue keys grey).
You will notice on the side of the sheet there are some extra keys. These are replacements for a couple of mistakes I have noticed in the original PET keyboard, a couple of inconsistencies and single key versions of space and return.
The top two replacement keys correct the pattern on those keys. It should start with a pixel top left, but the original PET keyboard has those two incorrectly starting without a pixel. On screen, you can see they match up correctly.
The next two variants are the colon and fullstop keys. All the other punctuation keys are light blue, so I have provided light blue variants of those. Finally, there are single key versions of return and space, so far I have not been able to locate suitable double width keys for those.
Once all the key caps are in place, next comes the grid that sits over the top. 
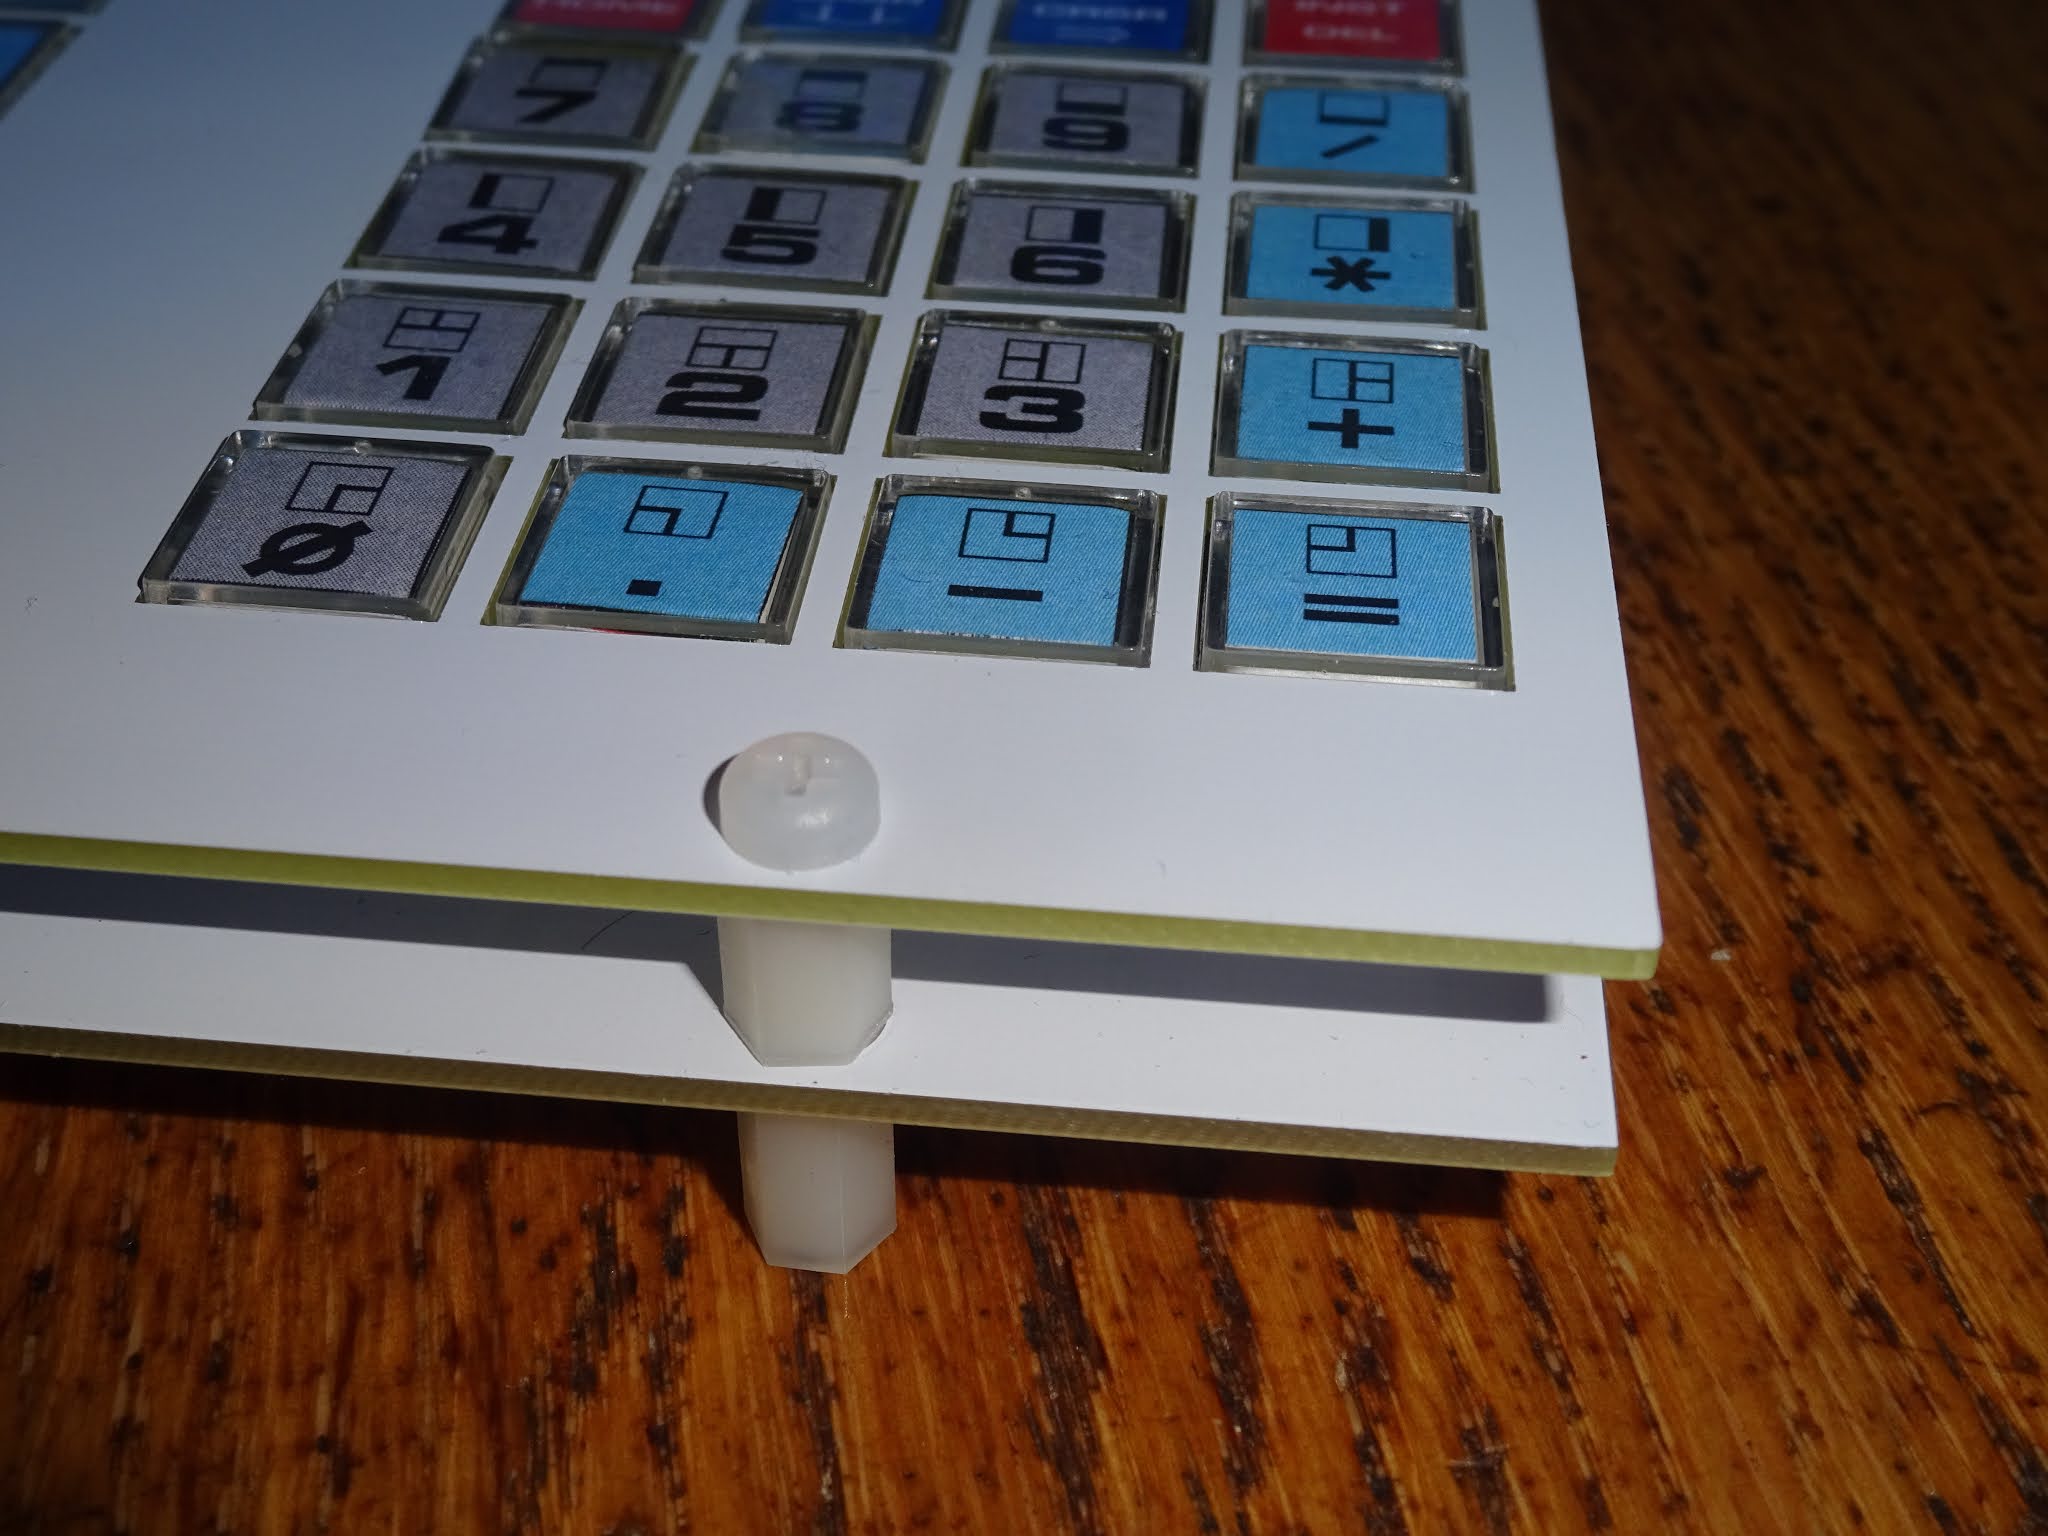
This is separated from the main PCB using 8mm spacers (the ones with the screw thread on one end). These are screwed to the top place using the 6mm M3 screws.
Sit that on top of the main PCB, you might have to wiggle some of the switches to get them all through. Then fix it in place using the 10mm spacers, which also act as feet.
When it's all assembled, the top of the keys poke up slightly over the grid, which holds them all square.
The connector set supplied will connect it to the Mini PET A, underneath the PCB for neatness.
And there you have the new Mini PET A with Deluxe Keyboard.
There is also an optional ribbon cable kit.
This includes a 20cm ribbon, a 60cm ribbon and two right angled connectors. This can be used for various other things. Maybe you want a Mini PET-SK?
Or maybe you want to try to recreate the VIC20 prototype?
Just stack the boards on top of each other.
Now it just needs someone to make a 3D printed or vacuum formed case......
It's sometimes easier to split the ribbon cable up to make it easier to move around.
You can then bundle up the wires and cable tie them together, in a similar style to the C64 and VIC20 keyboard cables.
An example of that is shown here, to connect one of my USB keyboard controllers.
And there you have a Mini PET Deluxe USB Keyboard.
You can also use the new keyboard to replaced a bad or missing keyboard in a PET 2001.
Here the keyboard is mounted without the grid, so the keys stick up above the top of the case.
The keyboard screws to the back of the lid in the same way as the original did.
Here I had used the bundled ribbon cable to attach to a Mini PET B board.
Together you have a complete update for a 2001.
You can use the ribbon intact if you prefer.
Makes little difference once the lid is closed.
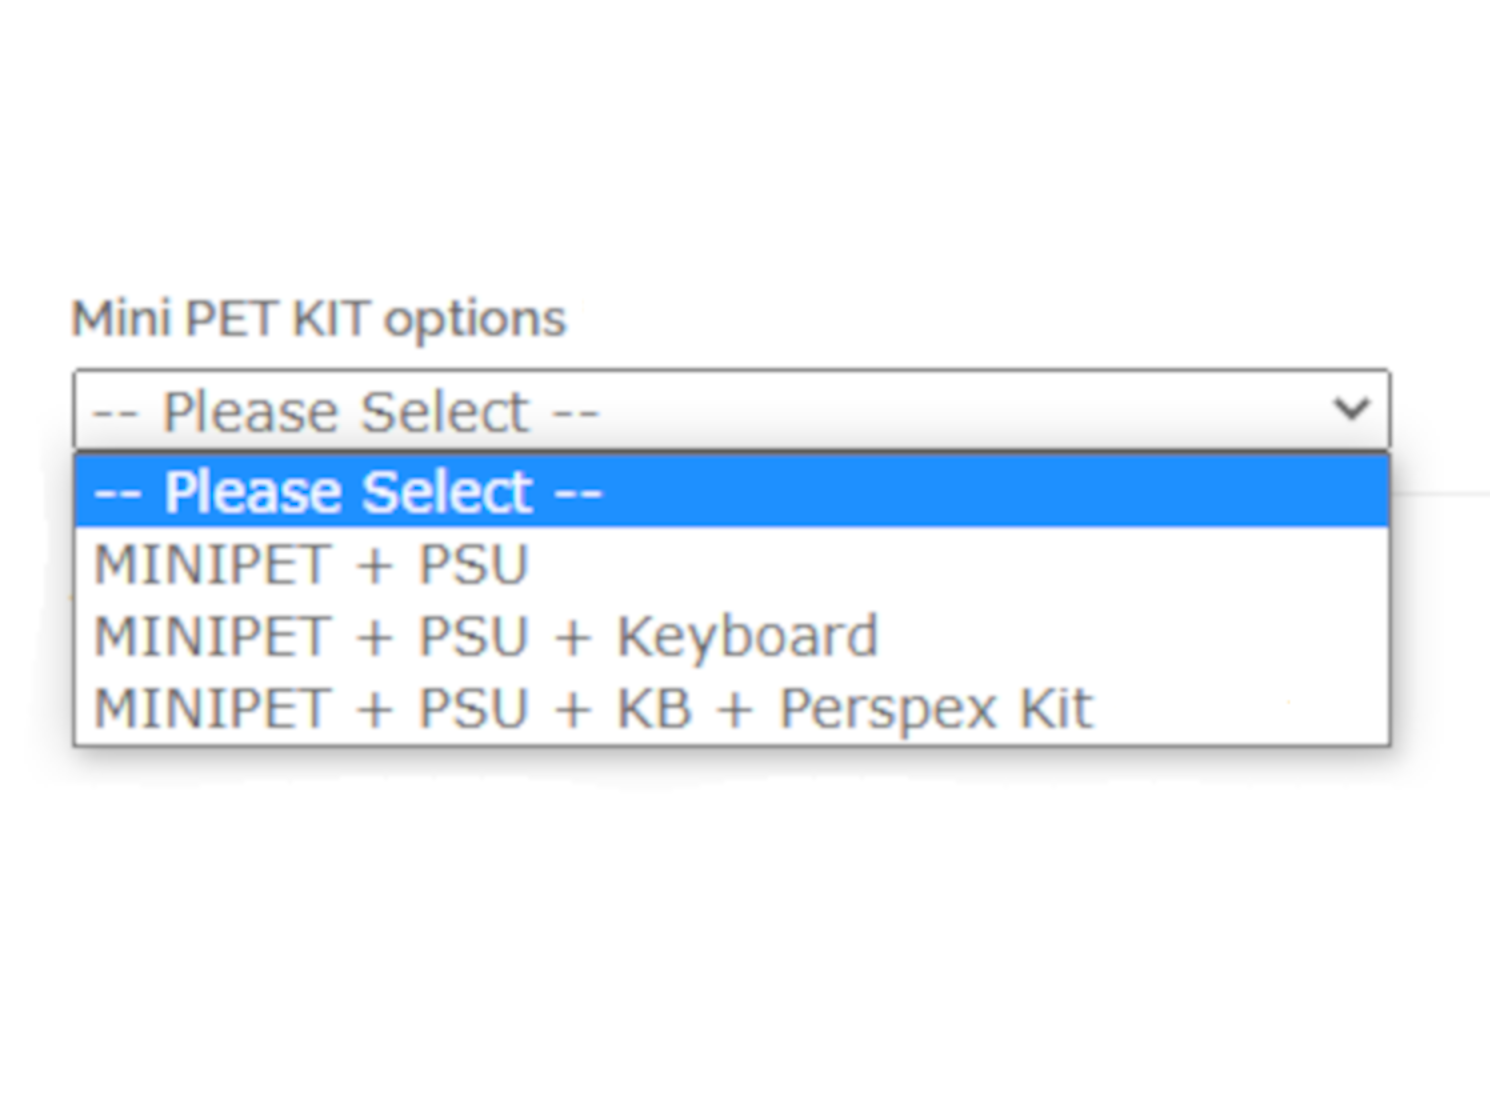
The Mini PET Deluxe keyboard is available from The Future Was 8 bit, on it's own (if you want to upgrade an existing PET or Mini PET) https://www.thefuturewas8bit.com/tms-pet-deluxe-kb.html
Or, as an option with the Mini PET A kit. https://www.thefuturewas8bit.com/shop/tynemouth-products/mini-pet.html
Or there will be limited numbers of built and tested Mini PET A with Deluxe Keyboard. https://www.thefuturewas8bit.com/shop/tynemouth-products/built-kits/bk-mpa-deluxe.html

2022 Update: The Mini PET has been replaced by the Mini PET 40/80. This has this type of keyboard built in and supports 40 and 80 column mode. Available now from The Future Was 8 bit.