This is an old post, preserved for reference.
The products and services mentioned within are no longer available.
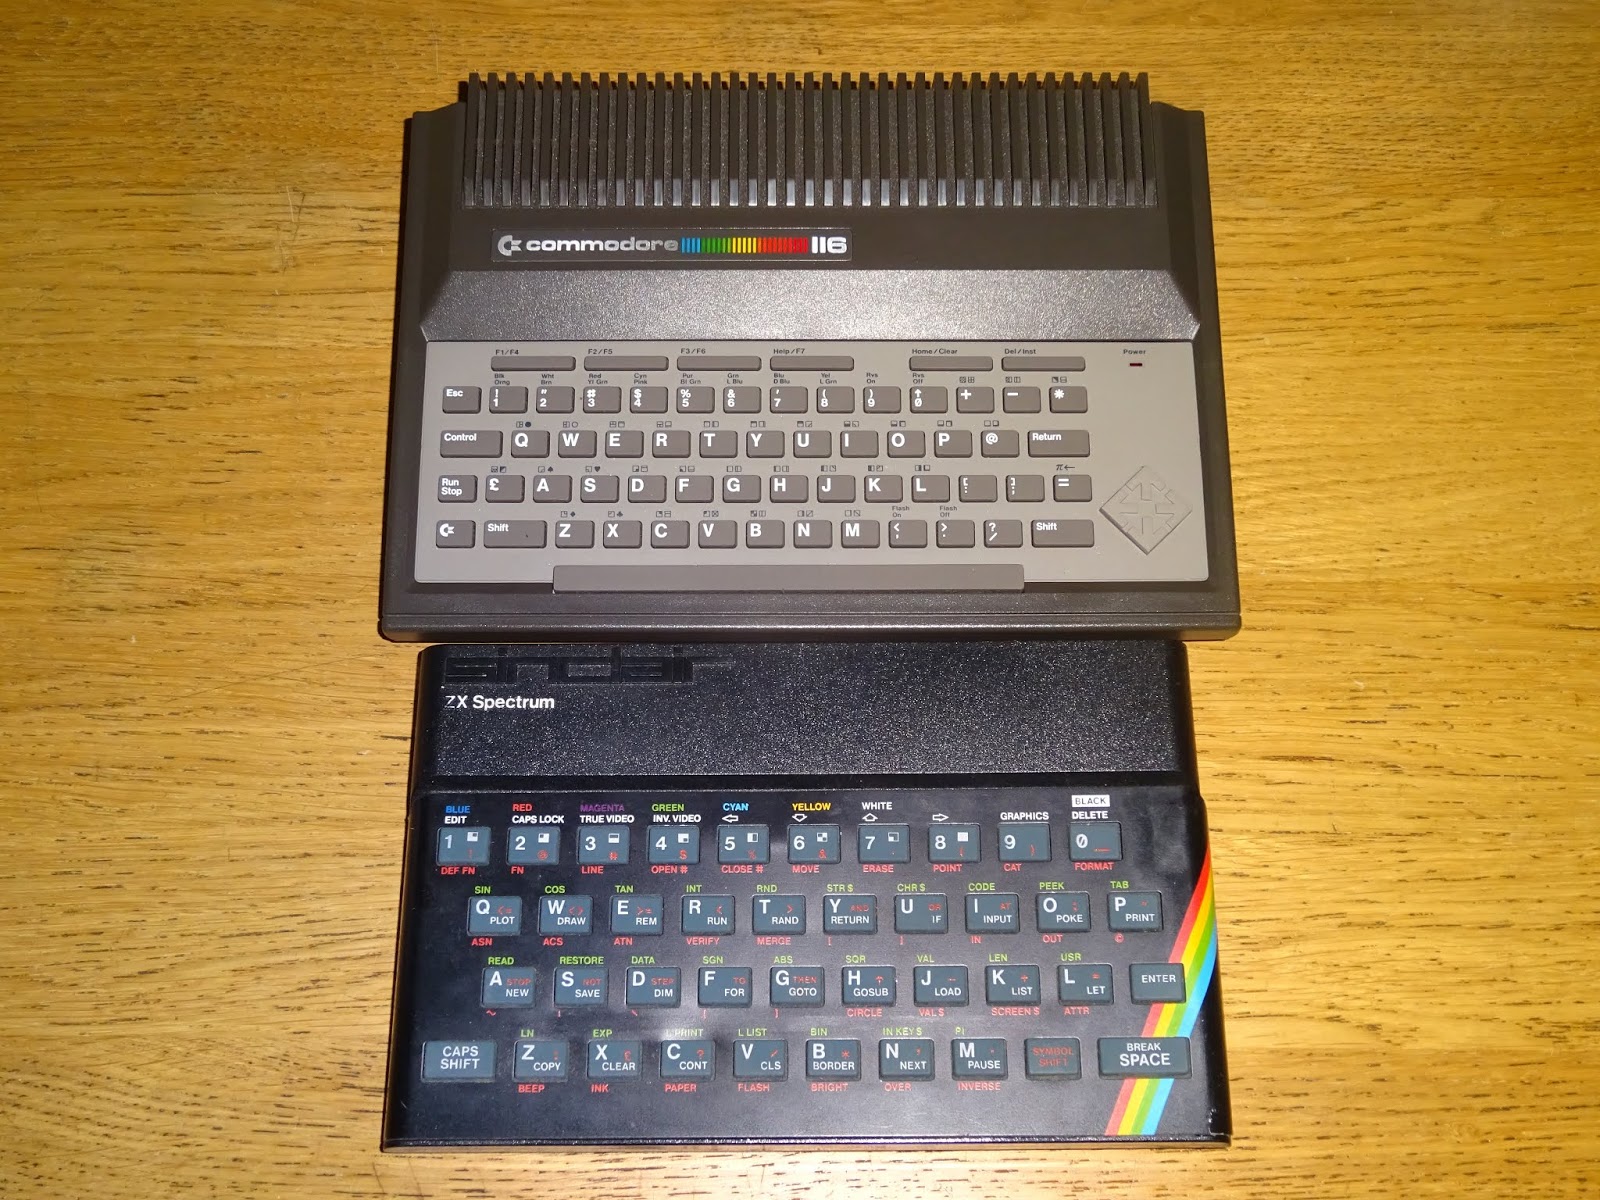
The Commodore 116 is one of the lesser known members of the 264 family of machines.
At first glance, you would be forgiven for thinking it looks like a plus/4 with a different keyboard.
But when you put them together, it's clear it's a much smaller machines.
Not quite as small as the Spectrum, which I think was the target, but somehow they manage to get much smaller keys that the Spectrum?
This is quite a nice C116, it came in for repair in it's original box.
Something caught my eye on the side of the box.
What does that say? 64k? On a Commodore 116?
Inside the box, it looks like a normal C116.
This might look like quite a low serial number, but maybe not for the C116, how many did the actually make? (
update: according to Wikipedia, they made 51,000 so this is fairly late).
Let's give it a go and see if it works (spoiler, it's been sent in for repair, so that is unlikely). Nope, black screen, with sync, so the TED is probably working, that's a good start. Let's try the
Diag 264 cartridge and see if it detects the problem.
That can't boot as far as a displaying text, but it gives a fault report by flashing the border. Here it flashed four times, indicating a possible RAM fault on bit D3.
Time to have a look inside the C116. Under the keyboard, it has a nice metal sheet providing shielding and also heatsinking for the TED chip.
All looking good so far, let's remove that shield
Oh dear, I don't like the look of this. In this game, the best thing I can find inside a machine is dust. When I see lots of shinny new sockets and non-standard capacitors, I get worried.
That usually means the machines has had a lot of work done to it, and that can really slow down diagnosing faults, as you have to double check all the work that has been previously done.
The machine probably dates from 1984, but it looks like a lot of work was done a few years after that. The 7805 has been replaced in 1988 (or sometime after), and then it's leg cut, presumably in an effort to track down a short on the 5V rail.
It looks like at the same time, all the logic ICs were socketed and replaced with new late 80s TI chips.
The capacitor modifications also included under IC decoupling capacitors. I remember seeing these in an electronics catalogue in the 80s or 90s, but I've never seen anyone actually using them. They are decoupling capacitors, probably 100nF or less, connected between pins 8 and 16, the supply pins on a standard TTL chip.
All of these modification look to have been carried out in the late 1980s, which would fit with the '64K' sicket on the case. Here are the two TMS4464 chips, replacing the originals which would have been TMS4416 (16K) chips.
These are fitted in the same way as the
Commodore 16K internal 64K RAM upgrade, cut the 5V to two of the inputs to the 257s and replace them with the additional address lines. See that
C16 64K blog post for more information.
Normally my first checks would have been the TED or the CPU, but the test results indicated a possible RAM fault, and since they RAM chips had been socketed, I tried replacing those (I also noted one wasn't sitting flat, but that didn't make a difference).
Had this been an unmodified board, I would have moved on, but I spent a bit of time at this point looking for bad soldering or broken tracks on the D3 line. All seemed fine, so I moved onto what would normally be the most likely candidate, the 8501 CPU.
Well, what do you know, it was indeed a bad CPU. Other than the loopbacks, all tests passed, including the 64K of RAM.
Since that turned out to be a rather trivial repair, I thought it would be interesting to compare this with a less modified C116. This is one I have had for a while, I picked it up ages ago with a plan to write a blog post on it. Well, here we are, so I may as well cover it now.
This is an earlier machine, but is also not working.
Looking around, you can how the other one would have looked, with the logic ICs soldered direct to the board, and disc capacitors, and various spots for additional capacitors that were not fitted as standard (but were all populated on the modified board).
This one has the original TMS4416 RAM chips, so is still a 16K machine.
Diagnostics this time gives a blank screen. Normally that would be the CPU or the TED. This one has the earlier 7501 CPU, and they tend to be more resilient.
Both appear to be working. Power is getting to the board, there is a reset pulse. What's next? Well RAM would be a potential, although the diagnostics normally picks that up, and it is soldered, so I'll skip that for the moment and try the other socketed chips, two ROMs and a PLA.
Although the C116 is quite a rare machine, it was replaced by the Commodore 16, which is far more common, and is almost exactly the same machine, in a larger case with a nicer keyboard.
This one is just too large to get in the same frame the C116.
That means a C16 can be a useful source of spare parts, and here come up trumps with a spare PLA chip that turned out to be the problem.
With the replacement PLA in place, this second C116 also passes the diagnostics, 16K of RAM this time, and an earlier revision of the KERNAL ROM.
Thanks to that one C16 donor board, the two C116's live.
The C16 was a machine I using for testing, so it will live again as I have a number of boards also missing one of two chips, so I'll repopulate the missing PLA, and possibly the CPU, although they are getting scarce these days.
With both machines up and running, time for some testing.
Luckily, the keyboard on the machine in for repair worked perfectly. These aren't the nicest keyboard to type on, and are even worse to work on as the keyboard PCB is heat staked in place.
That means if you want to open it up to clean the contacts, you have to break the pins, then how do you reseal them? The keyboard on my C116 was a bit worse, but that will have to wait for another day, most of the keys are responding, but some need more effort than others.
Setting up the C116 for testing, it does look comically small next to a perfectly normal size datasette.
The tape loading was fine
It took a while with a variety of loading stages.
But finally loaded without a problem.
When I fitted an SD2IEC, I finally found something that didn't look massive next to the C116.
Again, that worked fine. Remembering to use the later disk commands the 264 series supports, and the function keys which print up DLOAD" and DIRECTORY etc. for you.
That was all working, time for a quick run through of Rodman.
No problems here, and that also tested the joystick, so that's all back in it's box and ready to be returned to it's owner.