Showing posts with label Custom PC. Show all posts

Saturday, 17 March 2018

Updating a motherboard BIOS the hard way

This is an old post, preserved for reference.
The products and services mentioned within are no longer available.

I was presented with an interesting problem this week. I had been asked to build a PC for a friend, and they had sent me the parts they had chosen. Lots of boxes arrived, and all looked promising, lots of nice boxes from brands I like.
They had gone for an intel Core i3 7100, which is a good choice at the moment. However, there appeared to be a problem with the processor and motherboard combination. It wasn't the board I had suggested, but one that was cheaper. They said it should be fine, as it had apparently come up in the 'frequently bought together' section on Amazon with the processor, which I usually interpret as 'here is something else we want to sell you', rather than a guarantee of compatibility.
The board was a Gigabyte H110M-S2H. Not the latest 200 series chipsets, but the 100 series should support the later processors, and it has DDR4 RAM etc. so should be fine. Checking their website, it is listed as supporting 6th and 7th generation processors.
The box, however, didn't agree with that, it stated 6th generation only.
Checking the CPU support list, the processor is supported, but only with a BIOS update to version F20 or later. A bit of googling brought up a selection of reviews and ratings which indicated people had hit this problem before and either had to return the board or buy a cheap 6th generation CPU in order to be able to boot the board and upgrade the BIOS before discarding it and fitting their new 7th generation processor. Also comments from buyers on Amazon (where this came from) confirming the current boards were still shipping with the old BIOS.
I put those options to the buyer, either send the board back (I hadn't powered it up) and get a later one, or buy a cheap CPU just to do the BIOS update. I did look though the manual to see if it was one of the ones that can update the BIOS via a USB stick in a specific port, but sadly not. I could only think of one other way to do this. The BIOS chip on the board was a standard 8 pin EEPROM, if he were prepared to risk it, I could just remove the chip, program in the latest BIOS then put it back
Given the go ahead, I double checked the part number, MX25L6473F was supported by my programmer, so off with the chip it was. Kapton tape all around to protect the rest of the board, a bit of flux and some hot air and off comes the chip.
There are so many variations of small IC package these days, it's difficult to keep up, particularly when they interchangeably use different names for the same package, and similar names for different ones, SM8, SSOP, VSOP, TSOP, etc. Whatever it was, I didn't have an adapter board suitable to take the chip directly, so as it was only required briefly, I improvised.
A work of art no doubt, but it was recognised by the programmer, and as a test, I read back what was on there. I was expecting there to be a version number in there, but I couldn't find one. Nor was I able to match it to any of the 11 versions of the BIOS on the manufacturers website. The closest was version F4, which would not have supported the new processor.
They clearly had a neater adapter in mind when they drew the graphics, but it still worked. Programming took a minute or so, with version F25A, the latest on their website at the time. I did have lots of screenshots here, showing reading in, comparing the versions and then the erasing and programming. However, when I came back to my desk a few hours later, I found Microsoft had decided to reboot my PC to do an update. This had closed all the windows and lost all the raw screenshots. Well, I says 'my PC', it's clearly Microsoft's PC as they seem to decide when I can use it. Rant over.
I managed to clear a space just about large enough to test the board, and fired it up. I'm using an old 12V DC powered ATX supply. I find that useful for quick testing like this, a board like this only needs about 20W to post and do some basic testing.
Success! It booted and a quick check in the BIOS showed version F25a was indeed running, and the processor and RAM had been correctly detected.
I left that running for a while on memtest and it flew through. These modern intel processors have massive memory bandwidth, very impressive.
With that now working, it just needed building up in the case and Windows installing, and it's on to it's new owner.

Monday, 5 June 2017

Reverse PC build

Most PCs are built the same way around./p>

On the front you get the power button, a few USB ports and LEDs, and some optical drives.

All the interesting stuff is hidden around the back where you can't get at it.

These pictures are from 2011, the first time PC I built in this Fractal Arc Midi case. It has since been rebuilt a couple of times, most recently in 2014 with a Haswell i5 which is still running nicely, so no plans to upgrade that.

The problem still stands that it's a bit of a pain to get around to the back of the PC to plug something new in. The answer is to turn it around. I modified a PC like that back in the 90s, when I needed access to lots of parallel and serial ports on the back of the case. That was a more traditional case with the power supply at the top, so I swapped that to where the optical drives went and fitted a sheet of metal bolted in where the power supply went with the power switches and LEDs, fan controls, 4mm terminal posts wired to the power supply etc. I can't find any pictures of that unfortunately. This one should be easier as the power supply is out of the way at the bottom of the case, so it can stay where it is. The optical drives don't get much use, so I can just use a USB DVD ROM drive whenever required

The front panel still needs to be sorted though. I don't use the audio jacks, so can safely ignore those. The USB ports are handy, but there are already lots of those on the back. However, I use lots of USB devices, so with a few extra brackets, I can redirect the front USB ports to the rear of the case.

This also gains an extra USB3 port as the original front panel wasted one with a single socket even though the internal USB3 connector is capable of providing two.

The power and reset switches and the power and hard drive LEDs are trickier. Then I noticed there were two 3/4 inch holes on the back designed for watercooling pipes. I have no plans to fit an external raditator, but I could use them to fit some switches.

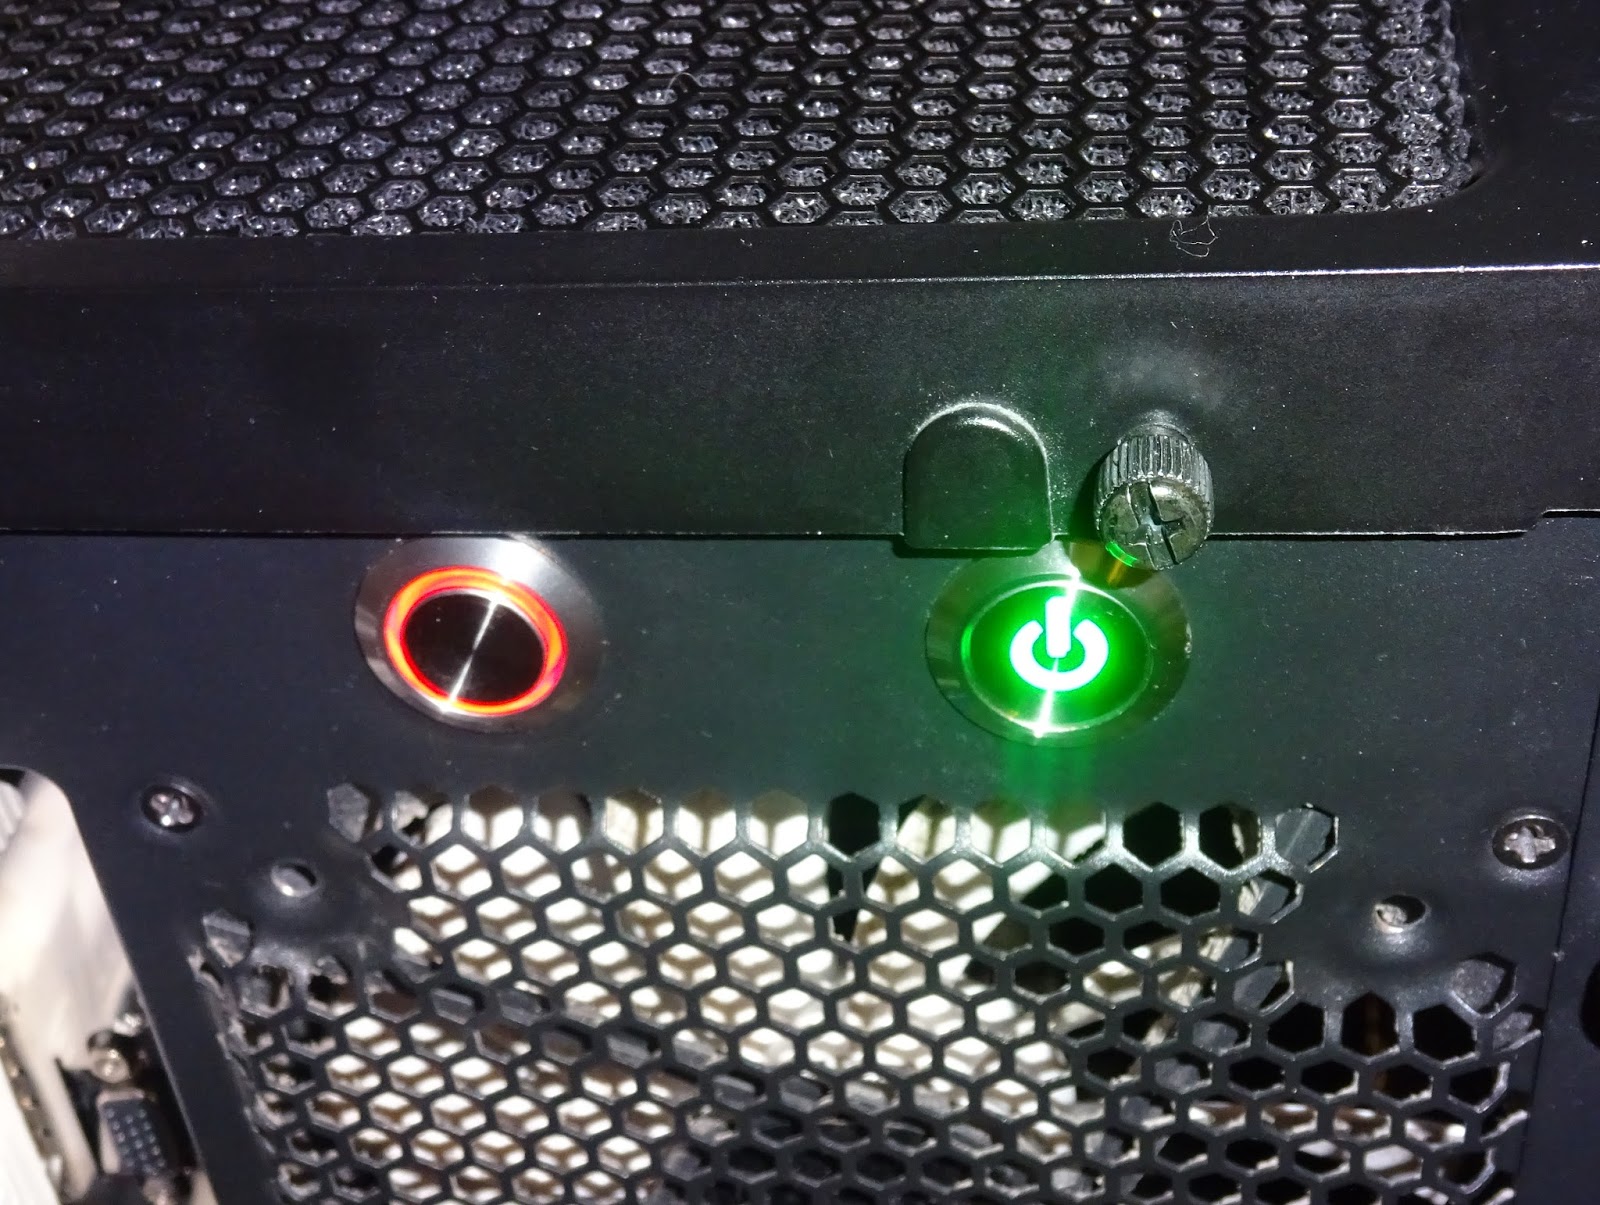
After some searching I found some nice 19mm mounting hole 'vandal resistant' switches which were illuminated. I chose one with a green LED illuminated power logo and one with an illuminated red circle.

I couldn't get the exact ones I wanted, so these are designed for 24V operation of the LEDs, and the power button is latching. To get around that, I opened them up. Inside I found a 1K resistor in line with the LED.

I removed that and reattached the LED across the two connections so it could be driven direct from the PC motherboard as intended.

The latch mechanism was removed from the power switch, which turned it into a momentary push switch which is what I needed.

These were wired up with standard PC front panel colours. Two pin connectors for everything but the power LED which has two single pins (to cope with 2 pin or 3 pin motherboard headers).

Those fit nicely in the hole and will provide the new front panel for the PC.

Obviously, I need to keep the wiring inside neat.

The wires are passed through and run down the back plate.

These come out just next to the motherboard front panel connector block. I had fitted one of those Asus easy connect blocks, which may have been from a previous motherboard, but it makes these things easier to plug in right.

The extra USB ports just about fill the back panel. Four of them are from a PCI card, these are the ones I use for testing USB devices, worse comes to worse, they kill the PCI card, rather than taking out motherboard USB ports.

I put the USB 3 ports in a separate vertically aligned slot, which makes them easy to access for memory sticks etc. Time to put it into place on the corner of the office desk.

The LEDs are working nicely, as are the switches. I suspect this will be one of those things where I will feel a little smug each morning when I turn the PC on via the new switches. It is always nice when you do something useful that you use every day to make your life easier.

That's all wired up, I have better view of the power and activity LEDs, and clear access to all the cabling when I need it, and it's out of the way in the corner so I now have more floor space where it used to be.

Nothing for it now, I'm going to have to get some proper work done.

Update

I've been running the PC like this for a few months now and it is doing it's job nicely. The only issue I have is that since moving the PC onto the desk, I have noticed the noise of the fans more than before. It's pretty quiet, but not entirely silent. The CPU fan was fairly quiet, I tried various fan profiles, but the real issue turned out to be the power supply fan.

This Corsair HX850 was left over from the original i7 system which was rather more power hungry. The current i5 system only uses a few hundred watts at most.

I have replaced with with a Corsair RM550x. This is still more power than the installed system needs, but a key point is it will only switch on it's fan when the load is over 225W, so most of the time it runs in silent passive mode.

Since I was redoing the cabling, I took the opportunity to commit to the reserve layout, and get rid of the optical drives and bundle up the front panel cabling where they used to be. The resulting was a lot less cabling.

I also removed the case fans (which weren't connected anyway) and swapped the CPU cooler for a larger quiet one (an Arctic Cooling Freezer 7 Pro).

The case is now very empty. And very quiet.

2022 Update

This PC is still running pretty much as shown here. All that has changed is I added two extra sticks of RAM and an NVMe drive in a PCIe slot.

Saturday, 10 January 2015

Two very different PCs - Custom built vs HP

This is an old post, preserved for reference.
The products and services mentioned within are no longer available.

I have two very different PCs on the bench today, and it's interesting to see just how different. The one on the left is one of my custom built PCs I'm just putting together. The one on the right is a generic off the shelf HP unit. Prices for the custom ones start around £400, The HP one would cost around £300. So what do you get for the difference in price, which one would you like?
From the front, the two look fairly similar, smart black cases, one badged Fractal, and one HP. One matt, one shiny (both with finger marks). Both have DVD RW drives, the one on the HP is hidden behind a flap. They both have two audio jacks, and two USB, the custom one has one USB 3.0 and one USB 2.0, the HP has both USB 2.0. It also has an SD card slot.
From the back, the difference is a lot more noticeable. There seems to be a lot of sheet metal on the HP on the right, and lots of mesh on the custom one on the left.
Looking at the custom built one in detail, on the rear is the mains input and power switch, then an I/O plate with a PS/2 port for anyone planning to keep an older style keyboard, four USB 2.0, two USB 3.0, gigabit LAN, SPDIF, four display options: HDMI, Display Port, VGA, and DVI, and six audio jacks. There are also four expansion slots, and there will also be a Windows 7 licence sticker going on there.
Inside, there is lots of opportunity for expansion, PCI express 3.0x16 slot, two PCI express 2.0 x1 and one PCI express 2.0 x8 slot. There are also a lot of additional power supply cables hidden in the spare drive bay, and the 430 Watt supply has much extra capacity. The processor is a Haswell i5, these are very solid chips with build in memory controllers and fairly decent on board video. The storage is a 250GB SSD, making full use of the SATA 3.0 on the mainboard at up to 560MB/s. Two of the four RAM slots are filled with 4GB DDR3-1600 sticks, these run in dual channel mode, so I'm getting a memory access speed of 18391 MB/s in memtest.
There are headers for additional SATA 3 hard drives, and header for extra USB ports, even parallel and serial if required. Cooling is via the intel stock cooler, which is fine for these modern intel processors as they just don't get that hot even at full pelt. There is also a 120mm case fan balancing the air flow with the 120mm fan on the PSU, giving neutral pressure in the case, reducing dust build up.
Looking in detail at the HP, it's a little different. No mains input, as it actually uses a 90W laptop style power brick. That does get a bit warm as it was drawing about 80W in use. It may be the mechanical hard drive making the difference, the custom one draws about 40W.
The other connections on there are two video options (DVI and VGA), four USB 2.0, gigabit LAN and three audio ports. Inside, it is fairly empty, although the case looked like it could accommodate a standard power supply and PCI expansion cards, inside it is clear it doesn't.
There is a mini PCI Express socket, with a WiFi adapter installed, but other than that, no opportunity to expand. The processor is the older Ivy Bridge i3, but at least it is an intel, most of the cheaper units use AMD chips, and I see lots of dead AMD laptops, so I'm not a fan. There is a single stick of DDR3-1600 RAM running in single channel mode, so it scores 9425 MB/s in memtest (half the speed of the custom one in dual channel mode).
The hard drive is mechanical 1TB drive, reading at about 80 MB/s. Most people seem to only use a few hundred GB at most, so the money would be better spent on a smaller but considerably faster SSD (about 560MB/s). HP have used their traditional slightly rotated Cooler Master heatsink and fan, and a rear 120mm fan. This arrangement pulls air into the case where ever it can, which is why you get dust build ups around any gaps or holes in the case.
Printers have become pretty much disposable items, this looks like they want PCs to go the same way. The HP board is non standard style, so it will be difficult to replace in the future. The case has 'security' screws in case you wanted to go inside, but they are just T15 and there is usually a full set of TORX bits in all these 101 bit screwdriver sets these days. So it seems to be designed to be plugged in and used and then thrown away in a couple of years time without ever being opened. That may be what people want?
When I build a custom PC, it has thumbscrews on the case, feel free to look inside. I like to do a proper job of cable management and a tidy case makes for better air flow. I use good quality, reliable parts, these all have at least three year warranties, and are standard sizes and easy to replace or upgrade in the future and to should last a long time. The system runs cool and quiet, and with the lots of RAM in dual channel mode and an SSD, very fast.

The HP is in for repair two months after the 30 day Argos warranty expired.

So which one do you want?

2022 Update: I wonder if either of these is still in use. I know which one my money would be on