This is one of a series of deep dives into how bits of the Mini PET work which I wrote up for my Patreon last year. I presented the original post as is, followed by a lot of new material at the end.
A few people had requested a power switch on the Mini PET, and it seemed like a useful thing to have, so on the early prototypes of the Mini PET 40/80, I added one.

This was a fairly simple option, an SPDT slide switch.

I wasn't very happy with that, it looked OK, but was a bit flimsy. The better option of a rocker switch like the VIC20 and Commodore 64 had been ruled out when I had looked at them before and found the right ones were about £5 each.

Around this time I was looking at different options for the Mini PET, and this one (which appears was codenamed 'Mini Clubman') I tried the option of adding the second datasette port to the rear. That give space on the side for other stuff, so I looked at adding a soft power button. It seemed logical at that point to move the reset and NMI buttons into this group, and a new 40/80 button fitted nicely.

There were two main things to sort out here, neither of which was right on the board above. The power regulators now needed to be able to be switched on or off - I'll look at those in a future post. This time it's the simple task of providing the on/off control signal.
The idea is to have a permanent supply whenever 9V is plugged in, that just sits there waiting for you to press the on button, and turns on power to the rest of the board. It then needs to sit and wait for you to press the button again to turn it back off.
I could have just used an 8 pin microcontroller, with a 78L05 regulator generating a 5V Standby power supply. It would be a case of reading the switch inputs in software and toggling an output pin. Easy, but it seems a bit like cheating.
There is also already a microcontroller on there, could I use that? Well, I ruled that out as I was already short on pins, and powering that from a separate 5V supply would have caused issues with parasitic power to the various chips attached to it (6522, 7132, HC86 etc.)
So, I went proper old school 4000 series CMOS logic. That is low power, and can run directly from the 9V supply without need for a separate standby voltage regulator.
The 4013 is a CMOS dual flip flop (pretty much the same functionality as a 74x74).

This was the initial schematic. The 4013_Init is an RC circuit to give a brief positive pulse on the 'set' pin to make sure it always goes into the right state at power on. (looks like I have the logic the wrong way around there - this was just a rough idea to see how it all fitted together).

By the time I reached the stage of getting some boards made, the logic had been swapped around a bit, and I have changed the circuit around the switch itself to a slightly better one which should debounce the switch contacts and give a clean clock pulse.

When the V1.76 boards arrived, I didn't like the look of the keyboard, I think I had spaced the keys out too far. The design had also changed a bit whilst these were being made (I had changed the video output shift register back to an HC166 from a brief stint using an HC165 - more on that in another post), so I never actually built up a complete V1.76 board.
(aside: I did use one of the V1.76 boards to make the base for the PET ROM/RAM test setup, but that deserves a post of its own)

At the time, the only bit I did populate was the area with the soft power on bits, to test that, and it didn't work very well.

These traces aren't from the same circuit, but show the effect I was getting. From the zoomed out view, you can see I press the button many times, and each time it is pressed, D (which is actually mislabelled, it is the clock signal) goes high, but the Q signal toggles briefly and goes back to it's original state and the 5V rail never switches on.

Zooming in, the D (again, these should all say 'clock') pulse is high when the button is pressed, but the edges are not clean.

What was initially a clean looking pulse is actually several pulses, and the flip flop was flip flopping too many times due to spikes from the button signal and the power was going on and off, and almost always going back to off.

This is mid press on another capture, and you can see a bit more toggling, which is too fast for the poor USB analyser to capture (at the time I was capturing this on using a cheap ebay logic analyser as it is the only one I had with analogue and digital inputs - see later for better captures on my new Keysight scope).

Normally the RC circuit takes care of that sort of thing, but it wasn't doing a good enough job. After some testing, I ended up using an idea I had seen in some circuits online, which added an RC circuit in the D-Q loop on the flip flop.

That seemed to work OK at 9V, but when I tried 8V or 10V, it was either not responding, or responding multiple times again.
Not good enough, back to the drawing board, or more precisely the breadboard.

I gave up and accepted that I would need to add an extra chip. something with a schmitt trigger to clean up the signal. I used a 40106 hex inverter, also 4000 series but a slightly odd number.
I was hoping to capture some nice traces to illustrate this, but it seems the input circuit on that logic analyser is not particularly high impedence, and is dragging the signal down.

But it works. Basically, it switches on and off at different thresholds, so there is no jumping between one state and the other as the capacitors charges. That worked very reliably, first time, no tweaking of values required.

I've also added one of the spare gates (there are 6 in a 40106) to clean the set pulse, not really necessary, but why not be tidy.

A similar circuit is used for the 40/80 switch. Here the reset pin is held high when 5V is off, so it will always start in the off state. The diode only allows current to flow into the Q output, so will only conduct when Q is low and the resistor is pulled up to 5V. This performs a level conversion, and also stops parasitic power creeping into other parts of the circuit.

The NMI button is now also debounced, with a second gate used to invert the signal again, to give an active low pulse.
The only button that is not debounced is the reset button, as that is handled by the microcontroller, and even if there is a glitch like this towards the end, it will just reset it again before it has a chance to start.

So there is a lot involved in getting a simple on off pulse. Yes, an 8 pin microcontroller would have been easier, but it was nice to do a bit of old school 4000 CMOS.

What does this fantastic new on/off pulse drive? Find out in next week's thrilling instalment of 'How the Mini PET works'.
Update
The yellow probe is connected directly to the switch, the green to the output of the RC circuit, which is the input to the schmitt trigger, and the blue shows the output of the schmitt trigger.

Here you can see the RC circuit slowly drops as the capacitor discharges, and starts to charge again once the switch is released. The schmitt trigger switches when the RC voltage crosses about 1/3 of VCC, and does not switch again until it is back over 2/3 of VCC. (the actual trigger voltages are closer, I am just generalising here)
On this capture, you might be able to see a bit of a blur on the falling edge of the switch pulse (in yellow).

Zooming in, you can see the initial contact bounce causes the input to go high again twice before staying low. If that were connected directly, it could be counted as two or three pulses. Here, the RC circuit has only just begun discharging, so the extra blips have not affect on the output.

The switches used on the Mini PET are already quite nice, so it did take a few goes to actually get some contact bounce. To better demonstrate better, I tried shorting the switch contacts with a bit of wire. That give a clearer indication of how much the pulse is cleared up.
Here you can see quite a pronounced blip in the input, and yet a nice clean pulse on the output.

Zooming in, you can see the green signal on the RC circuit starts to rise again, but not sufficiently to affect the schmitt trigger gate.

The rising edge had less of a blip, but still shows the nice clean response.

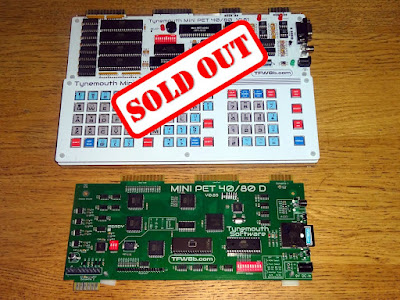
Mini PET 40/80D
The 40/80D does not have a soft power on, so has no need for the 9V CMOS circuitry. The NMI switch still needed debounching, so that uses a dual gate 74LVC14 chip to debounce that one signal.

Coda
I have used these circuits on several designs now, and they have always proven very reliable. However, I recently had a problem that left me scratching my head for quite a while.
I started writing up a Patreon post trying to describe the problem. In the process of which, I decided to get some more screen grabs from the scope to illustrate the issue. It was whilst getting those grabs that I discovered the problem. Neat. I like writing blog posts.
This is a simplified view of the circuit in question.

It switches a feature on or off based on a debounced switch input, the LED showing the state.
Here the two outputs are shown in yellow (/Q) and green (Q), and the switch input to the clock pin in blue.

As expected, when there is a rising edge on the switch input, the output change state, just like a flip flop should.

However, when there is a second pulse to turn it off again, they briefly change state, and then go back again. This is repeatable. If turned off, it will always turn on. When on, it will never turn off.
I thought the LED might be causing a problem, so I first changed the value of the resistor down to 2K2, and finally cut it out all together, but that made no difference.
I even tried removing the onward connections of the Q and /Q signals, so there was nothing else connected to the outputs of the chip.

In those pictures, the blue probe is the third input on the scope, trigger, to show the input pulse, and that is digital, so it looks nice and clean. I know it should be clean as it is being debounced by the same circuitry that handles the power on / off switch, which is working very well.

As this is part of the power on/off circuitry, the inverter gate is powered from 9V. A simple level shifter is created with a diode and a 5V pullup resistor. When the output of the inverter is low, the diode conducts and pulls the Switch signal low. When it is high, the diode is reverse biased, so no current flows and the pullup holds the Switch signal at 5V.
Just to be sure, I thought I would probe that with one of the analogue scope channels, so I connected the green probe to the same place as the blue one.

And there you go, it's not a perfect square, but it's being debounced, and .......
....hang on, that's working?

and back again.
Oh no, not another one of those things that change when you probe them (reference to another post, which will probably be posted in a few weeks time)
This was indeed now working most of the time. I found that when I had both the external trigger input and the green probe on that signal, it worked.
I tried a few things and managed to capture the issue with just the green probe connected.

It looks like there is just enough of a spike at just the right time to make it appear as two clock pulses and turn it back off again.
How weird. I would not have expected that.
Now, it seems it is being "fixed" due to the capacitance of the two scope probe together on the same pin. I could fix this by adding capacitance, but I'm never keen on doing that.
Instead of that, I reduced the pullup resistor to 4K7, to increase the rise time and give a sharper signal.
That seems to have fixed it.

I have overlaid the previous pulse in red

What of the other debounced switched you say? Why has this not been an issue elsewhere?
Well, power on/off is used directly in the 9V circuit, so no issue there, and that is working solidly and reliable. Reset is level shifted in the same way, but doesn't seem to be an issue (it may cause a second reset just after the first has started). The final debounced switch is Menu, and that makes use of the internal pullup in the micrcontroller, and has not been an issue so far.
All of the other interfaces to the 5V section were levels, this was the only time I had translated a pulse, which explains why I hadn't seen it before.
Advertisements
The Mini PET 40/80 kits are all sold out, but there are some Mini PET 40/80D boards still available from TFW8b NOW WITH £30 OFF (whilst stocks last)
https://www.thefuturewas8bit.com/shop/tynemouth-products/minipet4080d.html
You might have also guessed that the circuit at the end is from a potential new product, another 8 bit computer kit. If you would like a new kit to be available from TFW8b, please let them know, so they can see if there is enough demand to justify quite a large investment in the parts required to make more kits.
Patreon
https://www.patreon.com/tynemouthsoftware