
I have been selling various PCB only and PCB + programmed parts versions of the Minstrel and Mini PET kits on my SellMyRetro store - https://www.sellmyretro.com/store/tynemouth-software.

One of the most popular on there is the Minstrel 3 ZX81 compatible computer PCB. See this post for more info on what a Minstrel 3 is if you don't already know.
http://blog.tynemouthsoftware.co.uk/2019/11/minstrel-issue-3-zx81-compatible-computer-kit.html
Last month, I ran out of Minstrel 3 PCBs, time to order some more.
Well, that's that I should have done. Ordered some more.
Instead, I thought it might be an idea to update the board a little.
First off I needed to update the Tynemouth Software and TS logo and the font.

I wanted to add the pin header to the edge connector, as I had done on the last revision of the Minstrel 2. This gives an alternate option for add-on boards and also is a useful point to probe signals for debugging.

I also wanted to fix a slight annoyance with the PCB software. By default, it places the silkscreen part numbers the least appropriate way around on almost every part. So the ICs end up with the text upside down. It can be fixed, but I have to select and rotate the text on each part, one at a time. I normally do that before ordering the boards, but sometimes it resets them on export and I don't notice until I get the "your PCBs are in production" email.
So I made sure they were rotated this time.

That and the edge connector meant I needed to update the datasheet.

There was a slight problem with the part numbers, it seems in the past I must have reordered them for the purpose of the documentation, starting at 1 on the top left of the PCB (apart from the 3 big chips which came first). The part numbers are only for reference to the schematic. The values are printed on the PCB, and that is the most useful when you are fitting the parts, just fit a 10K resistor where it says 10K, rather than looking up to see what value R24 should be etc.

The numbering in the actual design schematic is based on the evolution of the design with some parts still retaining the numbers from the ZX80 design, and 100, 200 and 300 designations for different stages of evolution.

The first thing I looked at was the two 75 ohm resistors, which used to be R1 and R2, but were now R101 and R301.

OK, two options. I could update all six pages of schematics in the documentation with the new part numbers.
Or, I could update the part numbers on the picture.

And that is what I did.
I double checked the rotation of the part numbers and ordered the boards.

Whenever a get a new batch of boards, I like to build one up, just to make sure there were no faults in the production process (or indeed mistakes in the design, if there have been changes).
So, I need to put together a set of parts.
Ah, I don't do kits anymore, and I don't have any left.
I always used to keep a socketed board with a set of working ICs that I would use to build a test board. Good to start with a tested set of chips in case it doesn't work, I know that the chips were OK.
Oh, looks like I already stole them.
I'd rather not have to sort out a full set of chips from the boxes of tubes of chips I have. Not certain I have all the ones I would need anyway.
Ah, I remember I found some part-packed foam sheets. I think they were for the Minstrel 3+, which didn't end up happening. OK, I could steal the chips from there, most of them are the same.

OK, not ideal, a few of them are an odd package they did at one point which doesn't match the rest. The notch is much smaller, and the plastic body is smaller and less rounded.
The came from RS, so I don't think these are actually fakes, maybe E3 is a different style of packaging for some reason, but they were meant to be the standard E4/G4 packages, which was the code I ordered.

I really like the traditional Texas Instruments packaging, particularly the way the 14 pin and 16 pin ICs have the same sized plastic moulding on top.

That allows them to be laid out with a mix of 14 and 16 pin ICs in rows, all neatly aligned.

I get a little disappointed if I have to use the oddly sized packages which spoils the run.

As I started to go through those, I realised these were actually normal Minstrel 3 IC packs, just with the section at the top for the Minstrel ZXpand chips. OK, that makes things easier.
I just had to replace the odd chips with more normal looking 74HC02s and 74HC165s.

OK, so I have chips.
Actually I now have several sets of chips.
Hmmm I wonder.
I need to sort out a set of resistors and capacitors etc. anyway, maybe I should do a few more sets?

OK, well I may as well tidy up the IC packs and it looks like I am doing Minstrel 3 kits again.

I only include sockets for the three large chips with the kit. I used to offer a version with all sockets as an option, but hardly anyone ordered it. These days I advise against then for the logic chips, I think it looks better with them soldered direct, and removes a potential point of bad contact for each leg. But, it's up to you. As long as you double check the part number for each one before soldering, I don't see a problem.
Time to build one to make sure it's all working and I have all the right bits.
I dropped the parts in and soldered from the top as I usual do (you can do it the slow, painful, solder from the back, one part at a time, flipping the board around and around, way if you prefer)

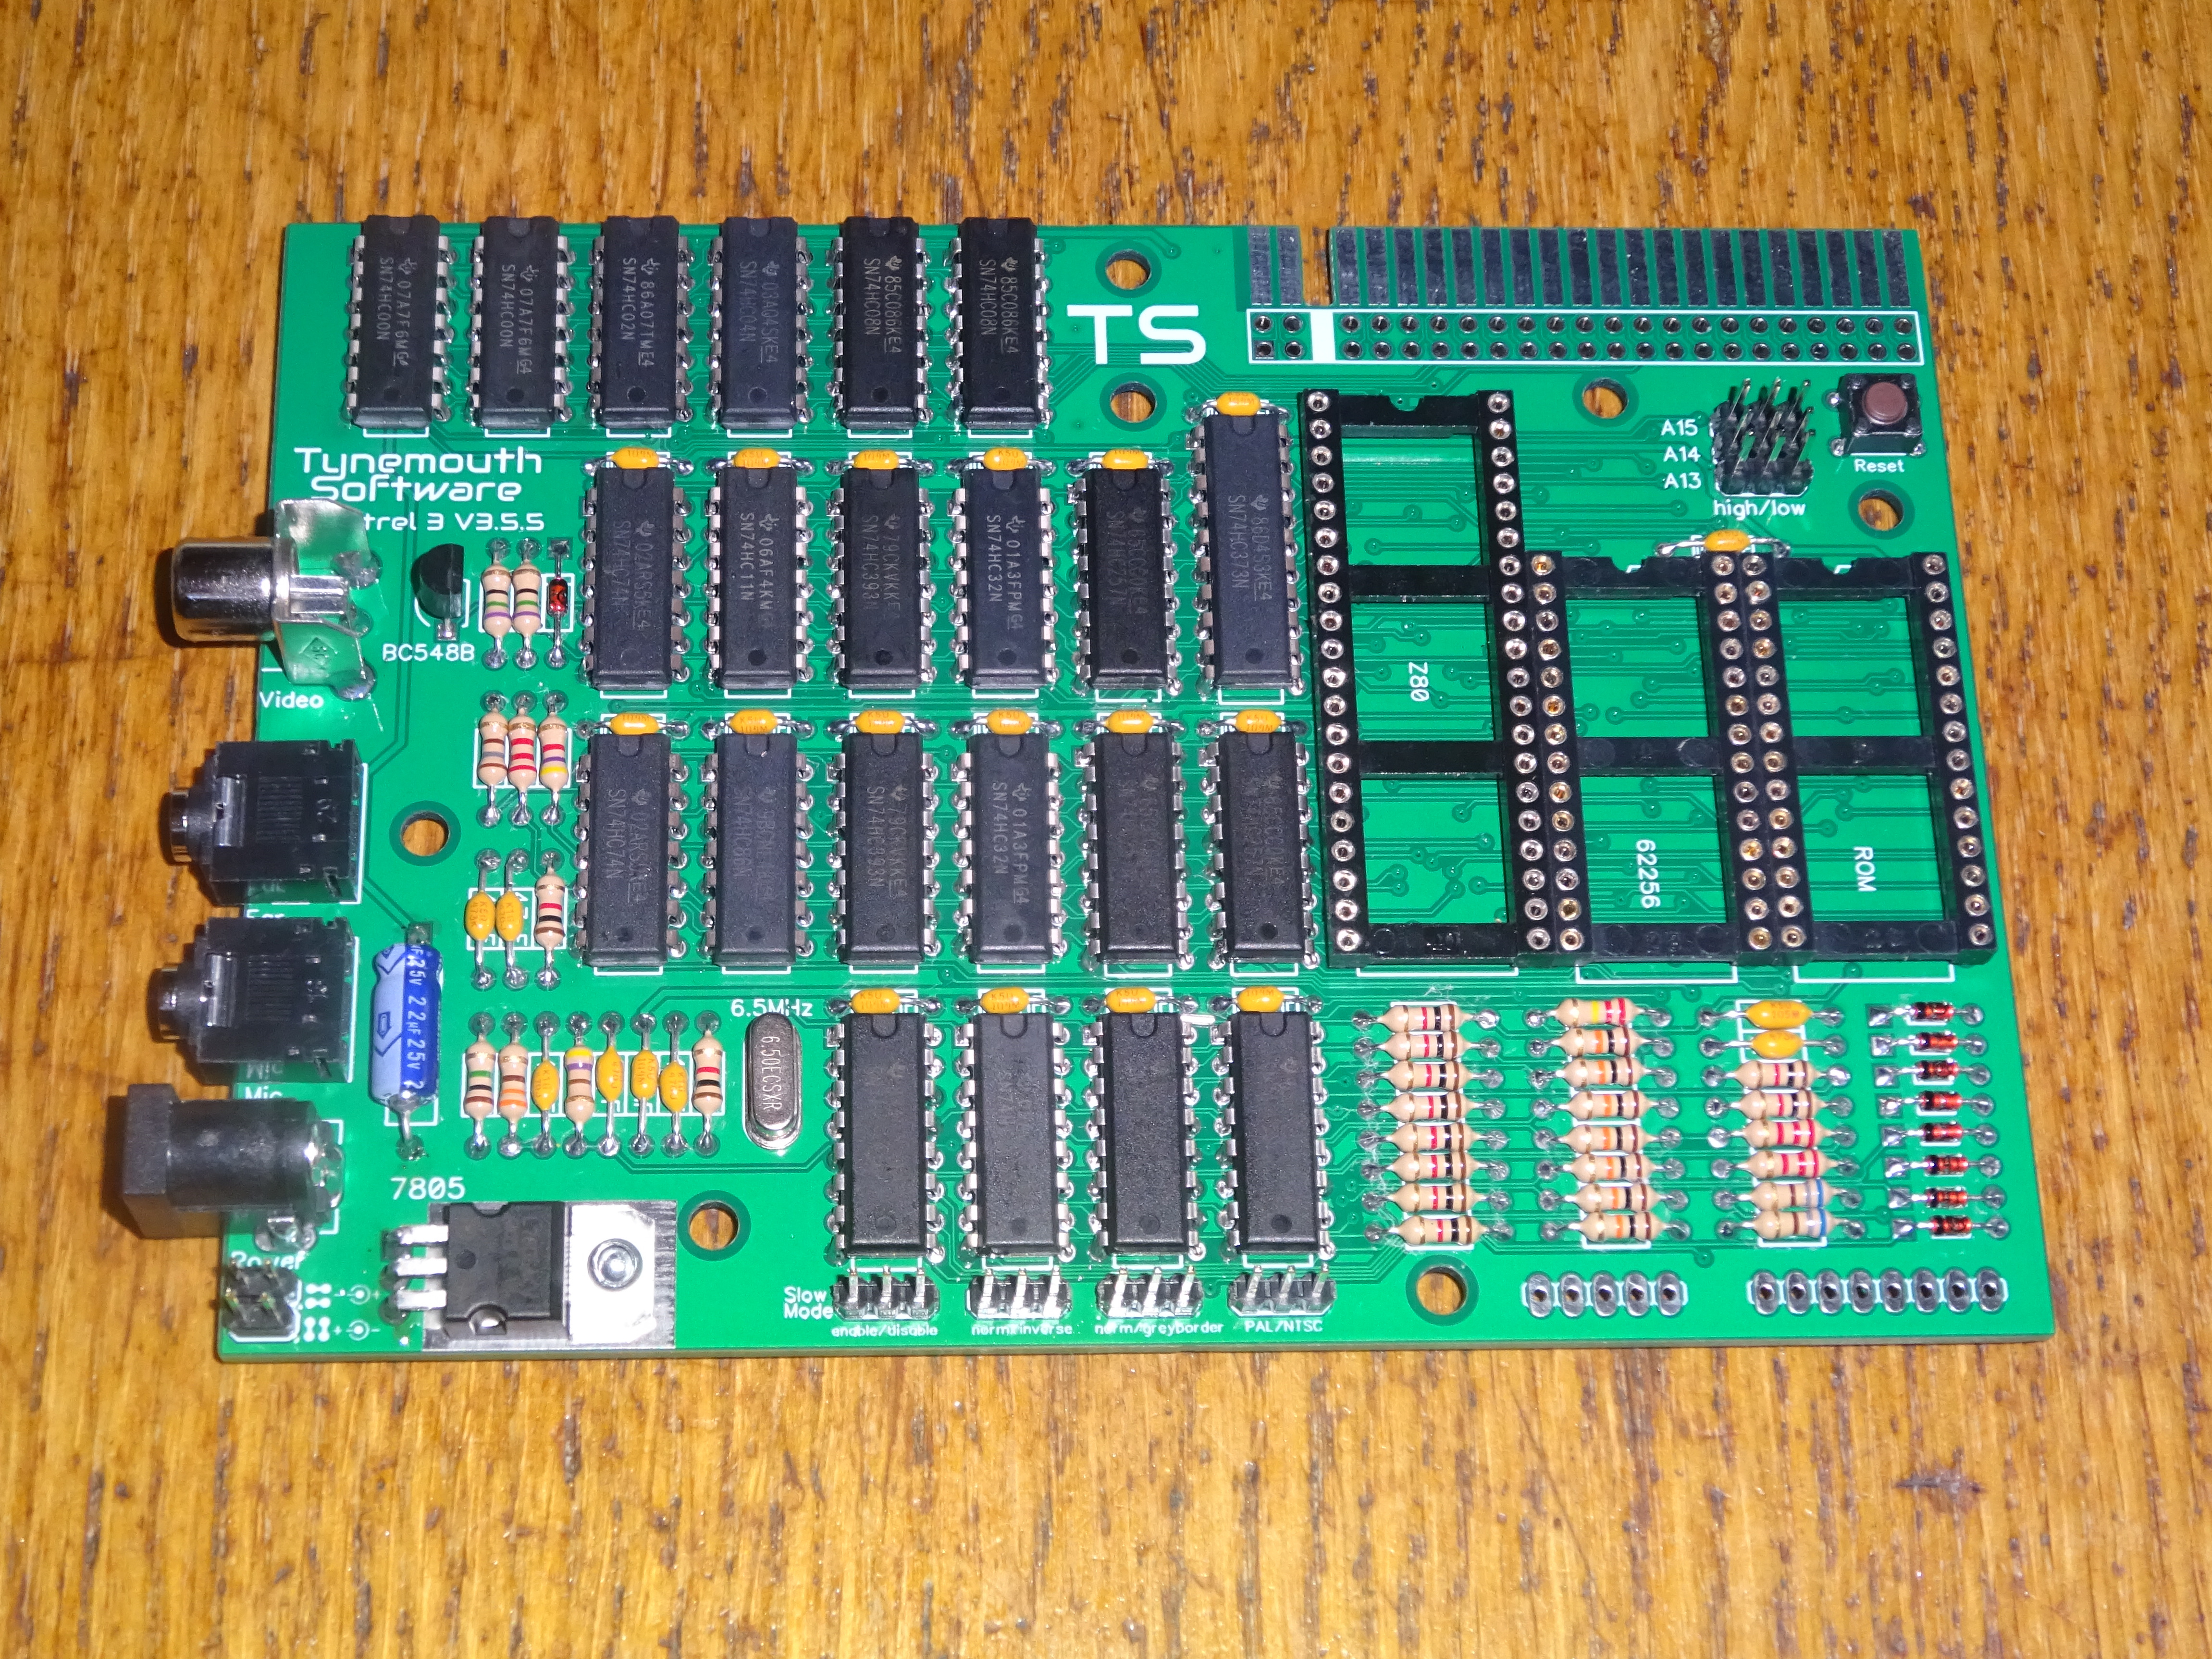
All done, time for the ICs and the rest of the bits. You might spot the other minor change I made, there is now a single capacitor above the ROM and RAM chips, as the previous one was a little too close to the mounting hole in some cases. I usually go way overboard on decoupling capacitors, so I am sure 1 will be fine. (note to self, did I remember to reduce the number of capacitors in the kit....? OK, you may have a spare 100nF cap. Enjoy.)

Following my normal plan, I first loaded the chips into the socketed board and tested that. That seemed to work fine, so I transferred them to the new board.

A couple of hints with the jumper blocks (whilst I remember to take photos). For the three by three at the top, use some jumpers to hold them into a block to keep them pointing vertically before you solder them in place.

For the four sets of three in a row, I have left 0.1" space between, so you can use something like an RC2014 connector to hold those in a row and vertical before soldering.

All ready to put in the socketed chips and test it out.
Here we go.

Time to turn it on.

Well, of course it worked. What did you expect?
There are various options for keyboards - see previous posts for those. e.g. http://blog.tynemouthsoftware.co.uk/2020/01/minstrel-building-hints-and-tips.html
In this case, I will go for the "fits inside a ZX81 case" version

This has the 5 way and 8 way flat flex connectors.

For bench testing, I use a new ZX81 membrane. I always get mine from RWAP - https://www.sellmyretro.com/offer/details/2529

Looks good.

I also tested loading from tape, and from a Minstrel ZXpand. Those aren't available any more. I don't think I will be able to do any more of those. They are also not suitable for the ZX81 case anyway.

I next tested with a normal ZXpand+, which you may have more luck getting hold of.

That's also looking good.

Now I know that is working, it can be fitted into a ZX81 case.
As with the previous boards, the two white ringed circles indicate the two screws that need to be fitted at this point. The rest of the screws go in through the back of the case.

And there you have a ZX81 that works just like any other ZX81, except it is all modern, lower power parts, has 32K of built in RAM with high resolution graphics support and a very clean composite video output.

There are three listings on Sell My Retro:
1) PCB Only

Minstrel 3 PCB + printed manual. No parts or keyboards included.
https://www.sellmyretro.com/offer/details/39921
2) Full Kit

Minstrel 3 PCB + parts + printed manual. No keyboard included.
https://www.sellmyretro.com/offer/details/62147
3) Built and tested

The board I built above. Suitable for fitting in a ZX81 case. No case or keyboard included. Can be adapted to work with a tact switch or other keyboard, let me know.
https://www.sellmyretro.com/offer/details/63727
Minstrel 2

There are also Minstrel 2 options still available, ZX80 compatible instead of ZX81.
- PCB only - https://www.sellmyretro.com/offer/details/62001
- Full Kit - https://www.sellmyretro.com/offer/details/63729
- Build Boards - https://www.sellmyretro.com/offer/details/62387
- Build Boards (last blue ones) - https://www.sellmyretro.com/offer/details/62386
Minstrel 4th

There are also Minstrel 4th options, Jupiter Ace compatible instead of ZX80 or ZX81.
- Minstrel 4th PCB + Programmed parts - https://www.sellmyretro.com/offer/details/61982
- Minstrel 4D Full Kit (TFW8b) - https://www.thefuturewas8bit.com/shop/tynemouth-products/minstrel4d.html
Manuals
All the above come with A5 printed manuals (the PDF version of which is linked in the listings).

TFW8b also have limited stock of the Minstrel 2, 3 and 4th spiral bound assembly guides.

These refer to slightly earlier versions of the boards, but the majority of the information within is still valid.
https://www.thefuturewas8bit.com/manual-minstrel.html
Patreon
You can support me via Patreon, and get access to advance previews of posts like this and behind the scenes updates. Most of the Minstrel 3 kits were snapped up by Patreon supporters when they received the preview of this post. Also includes access to my Patreon only Discord server for even more regular updates.
https://www.patreon.com/tynemouthsoftware
