
I think I should re-introduce the Minstrel ZXpand.
This is a special version of ZXpand which has been designed for use with the Minstrel 3 computer.

It overrides the BASIC LOAD and SAVE instructions to allow fast loading from a full size SD card or serial. It also adds a 9 way D joystick port.
ZXpand was originally designed and produced by Charlie Robson (sirmorris). Those are now out of production and difficult to get hold of.

The Minstrel ZXpand was produced with his approval and assistance to work only with the Minstrel 2 and later Minstrel 3. I have simplified the design to reduce size and cost, making use of the 32K RAM already present in the Minstrel 3. A replacement ROM is provided for the Minstrel 3, and a wire link attached to the ROM jumper block to select the ZXpand ROM when required.

This version does not feature it's own ROM or RAM.
So it cannot be used with a real ZX81
(I am only going to mention that once, but hopefully it is in big enough letters to sink in)
When you power on, you will be greeted by a banner.

You can now use the Minstrel 3 as normal, the Minstrel ZXpand will be waiting until you need it.
You can also configure it to load a menu program at power on, such as ZXpand Commander.

See here for more information
Three new commands are added to BASIC when the Minstrel ZXpand is active:
- CAT (to get a directory listing)
- DELETE (to delete a file)
- CONFIG (to change options)
Those commands replace three lesser used ZX printer commands (COPY, LPRINT, LLIST). They are already marked on the Minstrel 3 keyboard overlays.

If you press Z, you will now see CAT in place of the ZX printer COPY command.

When you want to load a program, just type LOAD, with the program name (e.g. LOAD "3DMM" - the .P is optional on LOAD, and is only required for the DELETE command)

And in no time at all, the ringmaster will be greeting you.

The joystick port supports standard 9 way D Atari / Commodore joysticks, and can be read in three ways:
The ZXpand protocol
This is a way to read the port directly from assembly language code, which is supported directly by several games.
A replacement INKEY$ function
When the ZXpand is active, the INKEY$ function will also return joystick movements. These are normally set to be the cursor keys, so when you move the joystick left, it will look to any program calling INKEY$ as if you are pressing the 5 key. The keys can be changed using the CONFIG command, if you want WASD or any other combination. Any BASIC game should use this without modification.
Kempston compatible interface
Joystick movements can also be read form port $31, compatible with the Kempston joystick interface, also supported in many games.
The Kempston port and the ZXpand can be disabled by jumpers. The ZXpand can also be disabled in software
3D Monster Maze uses the INKEY$ function, so you can run away from Rex using a joystick without any changes to the original game.

When loading, you can also add a path to the load command, e.g. LOAD "REVIVAL/DOWN"

I know I always load 3DMM, but Down is another of my favourites, and supports the ZXpand joystick.

It detects it automatically, so you need to use it to press fire to start the game.

If you don't want that, you can set the Minstrel ZXpand to be disabled after load by adding ;X to the command. eg. LOAD "25THANNI;X"

The 25th anniversary demo is great, and needs every spare bit of RAM and the original ROM. If you run it with the Minstrel ZXpand enabled, there is some screen corruption.

With the ;X option, it runs fine.

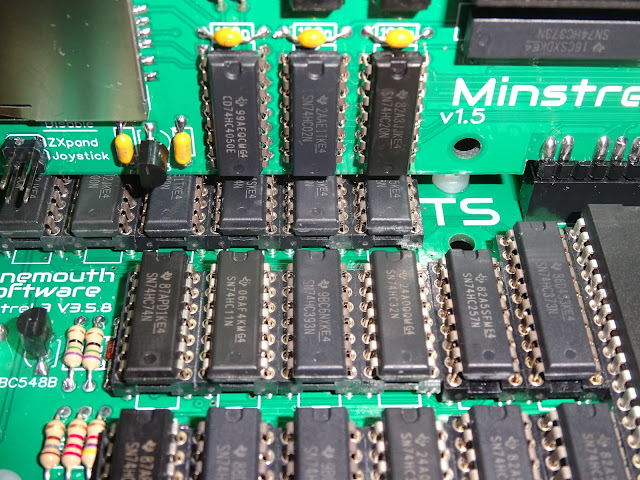
There are a few differences between these V1.5 boards and the previous V1.4.

The logic chips on the side were originally lined up with the Minstrel 2.

The new version has been rearranged to line up with those on the Minstrel 3.

Yes I know that makes no difference to the functionality, but I think aesthetics are important, and I can waste my time relaying a perfectly functional PCB if I want to. So there.
One new feature is a 6 pin FTDI header has been added. This can be used to load files into the Minstrel 3 via serial from a PC.

A standard 6 pin FTDI serial cable can be connected, ground (usually the black wire) is marked with a "-" and is closest to the edge of the board. (I think I might even have got direction arrows correct, < out of the FTDI connector, > into it)

The PC program can be downloaded here -
This works as a server. You need to wait until the Minstrel 3 is at the K prompt, then run the server with two parameters, a .P file and a the com port your FTDI cable is on, e.g. COM1. Don't worry about the speed settings, the program automatically configures this as 38400,8,N,1.

The server is written in C sharp (Charlie has provided the source on the github). You can use it on linux with the mono framework and the port would be in the form of /dev/ttyS0.
Once that is running, type LOAD "$" on the Minstrel 3.

When you press new line, it will begin to transfer blocks over the serial connection.

It is a lot faster than loading from tape, and can be useful during development to avoid having to keep copying updated code to the SD card.

Once complete you can run your program (if it hasn't already started).

As above, you can add the ;X to the LOAD command to disable the Minstrel ZXpand after loading if that is required.

Don't do the maths, the 25th anniversary was 2006. But that was only a couple of years ago, right?

The Minstrel ZXpand is available as a kit or pre-assembled, ready to plug in and go.

An SD card is required. The older, slower and lower capacity the better. Avoid microSD in adapters if you can, the adapters are not very reliable.
The SD socket is supplied pre-soldered onto the PCB. The remainder of the kit is standard through hole parts.

None of these versions will suit anything inside a ZX81 case. The ROM jumper needs to be connected to the Minstrel 3 jumper block, on either the front or the back of the board, so it is only suitable for open stand-alone SBC style systems.

Jason at JLProjects has designed a 3D printed enclosure for the Minstrel 3 and Minstrel 3 + Minstrel ZXpand.

The STL files are available here:
Minstrel ZXpand options
There are three options to suit your system:
Vertical pin header

This version is designed to mount vertically, either in the Minstrel Expansion Bus backplane, or in the Minstrel Expansion Bus socket on later Minstrel 3 boards. This is the recommended configuration.

The jumper wire connects to the Minstrel 3 jumper block. The reset button is not fitted here as the one on the Minstrel ZXpand is used in preference (long press = reset ZXpand, useful if previously disabled).

It will sit neatly on top of the Minstrel 3, even if you used IC sockets.
Horizontal soldered

This version has a pin header which is soldered directly to the Minstrel 3 edge connector, or the pass through connector on the Minstrel Expansion Bus. (here showing the older version, but the newer style will be supplied)

This provides a very reliable connection, but is not reversible.

Horizontal edge connector

This version is as above, but instead uses an edge connector. This can easily be removed, so is more adaptable, however the edge connectors are not as reliable as the pin headers or soldered connections.

The two horizontal versions include 10mm nylon pillars and screws matching those used on the Minstrel 3 kits, so it will sit level behind the main PCB.
The standard kit comes with a socket only for the 40pin microcontroller. Optionally sockets are available for the logic chips. (the ROM goes into the socket already present on the Minstrel 3).

Kits are available from my Tindie store
There is also the Minstrel Micro ZXpand, which takes up a lot less space, but does not include the joystick or serial interfaces.

I currently have none of the Minstrel 2 style boards. If anyone is interested, let me know and I will get some ordered with the new serial header.

Adverts

I have listed this and all the other Minstrel Expansion Bus modules and backplane on Tindie.
- Minstrel ZXpand - https://www.tindie.com/products/tynemouth/minstrel-zxpand/
- Minstrel Expansion Bus Four Port Powered Backplane - https://www.tindie.com/products/tynemouth/minstrel-expansion-bus-4-port-powered-backplane/
- Minstrel Input Monitor - https://www.tindie.com/products/tynemouth/minstrel-input-monitor/
- Minstrel Joystick Interface - https://www.tindie.com/products/tynemouth/minstrel-joystick-interface/
- See also ZX-IO by David Stephenson (www.zx81keyboardadventure.com)

I understand now is not the best time to be selling on an American site, but I am from the UK. All products are designed, built and shipped by me, here in the Tynemouth in the north-east of England.
And now isn't the best time to be English either, but please don't penalise me or other small businesses that are just trying to do their thing.
I don't think it is going to help anyone by boycotting businesses because of the actions of those that run the countries they live in, or where the platforms they operator on are based.
My listings are on Tindie, but if you prefer, DM me or use the contact link above to order direct.
All international orders may be subject to local tariffs, taxes or duties, and handling fees etc. Please be aware of this before ordering.
Patreon
You can support me via Patreon, and get access to advance previews of development logs on new projects and behind the scenes updates. New releases like this will be notified to Patreon first, if you want to be sure to get the latest things. This also includes access to my Patreon only Discord server for even more regular updates.


