This is an old post, preserved for reference.
The products and services mentioned within are no longer available.
This is the fifth parts of the repair and restoration of a Commodore Pet 4032, you might want to start at
Part 1. The story so far, the video circuits are now fixed, and the Pet is working, but only because it is using a
ROM and ROM replacement plug in board. It's almost like the original design for the BBC, a main unit to provide I/O, video, keyboard etc., and a seperate unit with processor, ROM and RAM. Only in this case, they share a CPU. I could leave it like that. It is working, but I'd rather remove it and get back to the PET running on it's own.
I previously removed the ROMs as one was getting hot, and tested them. All but one were fine, as it happens the one that failed was the editor ROM. Quite useful as that is was 80 column, business keyboard, and when this is finished, I need to change that to 40 column, normal / graphic keyboard anyway. I've burned and tested a replacement for the moment. The old Dymo labels don't do well here, rather than 80 n 50, it looked more like 'BONSO'. Shades of Neil Innes?
The
new label printer does a much better job, but the 40n50 will need to wait until I switch the video circuits to 40 column mode.
Putting the ROMs back and disabling the ROM side of the ROM / RAM board, but leaving RAM replacement enabled, it wouldn't boot, and one of the BASIC ROMs (UD8) was getting warm again. Checking with the 'scope, there appeared to be some conflict on the data lines. If I removed UD8, and powered on, it chirped, but there was nothing on the screen (since one of the BASIC ROMs was missing) and there were no conflicts on the data lines.
Nice verdigris on the J4 connector, but next to it, the ROM selection is controlled by a 74154 4-16 line decoder. This was one of the chips that had been damaged by corrosion and replaced, so that should be ok. I couldn't see anything out of the ordinary in normal operation, so time for another test device.
This is a NOP generator, it's a standard technqiue, and there are many ways to this, you can bend the pins of a 6502 and solder directly, or build a plug in ROM wired for NOP. I built this one using one of the spare ROM/RAM boards. The CPU is wired directly through to the socket on all but the data pins. On the ROM/RAM board, they are isolated by a tri-state buffer, here they are not connected through to the board at all.

Instead, they are hard wired to 0v and 5v in the pattern 11101010 (0xEA), which represents the 6502 NOP instruction. So whatever address the CPU tries to read, it will see 0xEA. When the CPU starts up, it will read 0xFFFC and 0xFFFD to get the reset vector. It will read 0xEA for both, so will set the program counter to 0xEAEA, and read the instruction there. That will read 0xEA, which is the 6502 op code for NOP, no instruction. So it will just increment the program counter and read the next instruction. That will also be NOP, and so it will continue until it gets to 0xFFFF where it will just loop around to 0x0000. And so on. What this achieves is the address bus continually cycles through the entire address range several times a second. So if you look at A0, you will see a 250KHz square wave, A1 will be 125KHz, down to A15 at 7.6Hz. Checking this showed that A3 and A4 both had an identical odd stepped pattern, and I traced that to a short on one of the ROM sockets. It still didn't work though, so the next step was to check the enable signals on the ROM chips.You can probe around the board with a 'scope or even a frequency counter, but I went for an eight channel logic analyser, so I could see the signals more clearly.
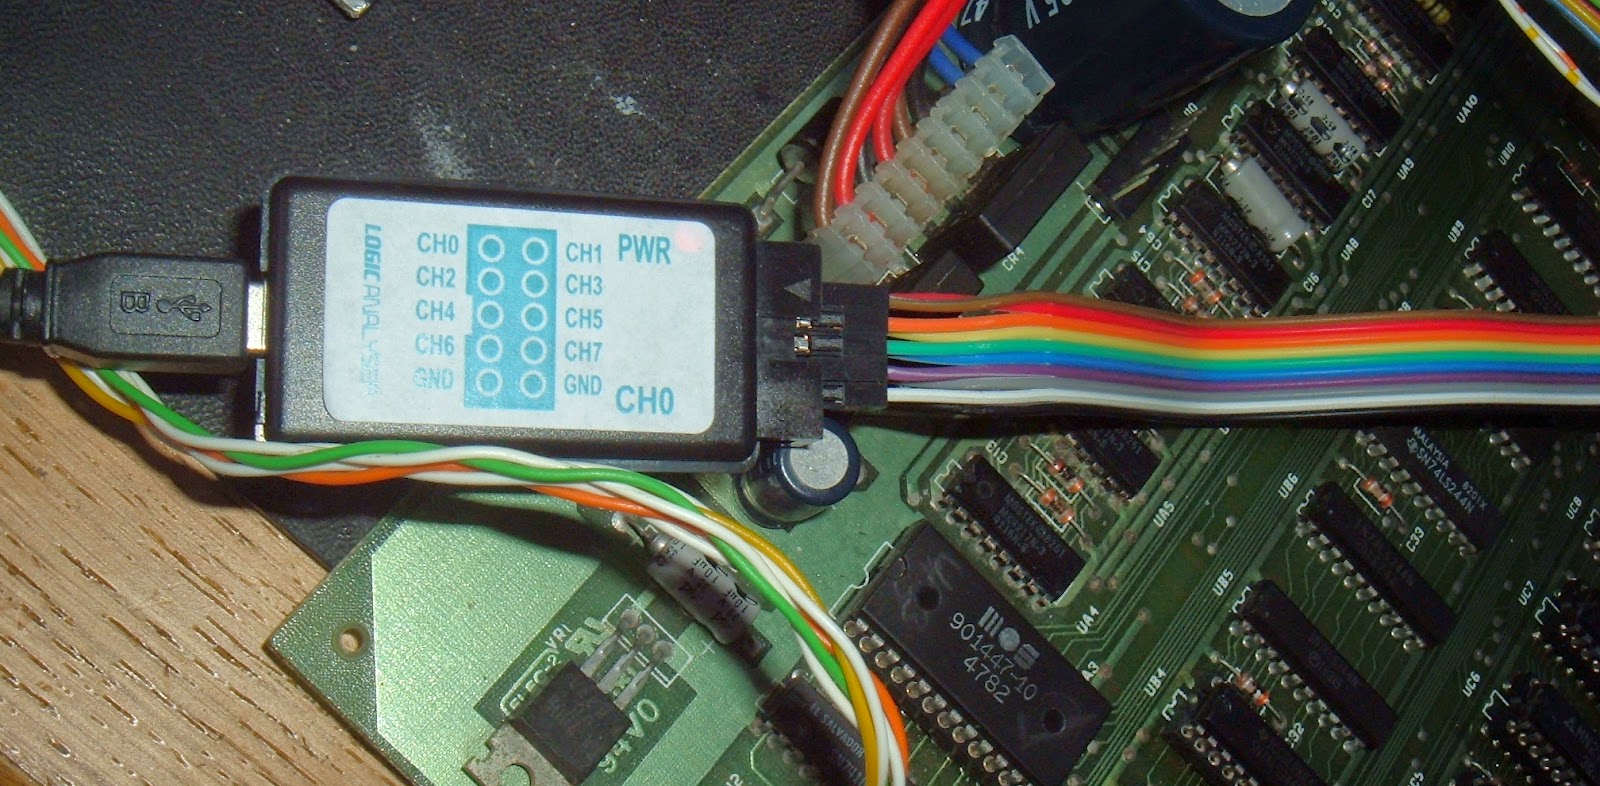
This is the cheapest of the cheap ebay job, which is a clone of the nice Saleae ones, and indeed copies their firmware, so their software thinks it is one of the theirs. It' a bit cheaply made and the probes were a bit rubbish, I tried to use them when testing the 74LS138 as part of the video circuit repair.
They stayed on long enough to get a couple of readings, but kept falling off. There were also problems with initialisation, I found the USB had to be plugged in before the target device was powered, otherwise the device would have power up due to parasitic power and fail to initialise. I suspect that may have fried the 7400 chip, as I was sure I had tested for that signal before, so I'm a little wary of it.
It did at least prove the display write signals were there, but I gave up in the end. I suspect the proper one will resolve these issues, and it has proved useful enough, so I'll probably buy one in time.
In order to test the enable lines, I've used breadboard jumper wires to make the connections, and that seems more stable.
This is the view showing the enable signals at the 7 ROM sockets UD12 down to UD6, and also A11, the highest address bit going to the ROMS. As you can see, the first ROM is enabled, then the second, then the third etc. There are two odd things. One, Channel 5 shows the signal to UD7, the editor ROM, and that has a glitch in it. However, that is meant to be there as that is the I/O region, located in the address space of that ROM, and the ROM is disabled when that area is accessed. The other thing is that channel 4 (UD8) is completely wrong. In fact, it's not channel 4, it's A10 by the look of it. I double checked my connections as A10 is pin 19, and the enable signal is pin 20. Checking further, I did find a short under the socket between pin 19 (A10) and pin 20 (enable).
With that fixed, the logic analyser showed the select lines were now how they should be. Time to reinstall the ROMs.
With the ROM/RAM board still in place to provide 32K RAM, but the ROM switched off so it uses the on board ROM, time to power on.
Success! The Pet is now using it's own ROMs, I/O and video circuitry. The next step is to fix the RAM....
(well, OK, the next step was actually the
FAT40 conversion)


