Sunday, 18 December 2022

AY-3-8910 / YM2149 Sound Card for RC2014 (and Minstrel 4D)

I have spent a large part of the last few months packing kits, and putting several of them together along the way. (actually most of the last 6 years, the Minstrel 1 was December 2016)

Today it's time for a change, I am going to be putting together someone else's kits.

These are two RC2014 modules, direct from z80kits.com, the home of RC2014.

I'll look at the IO card in another post. First I am looking at a sound card for the RC2014 bus designed by Ed Brindley and now produced by Z80Kits.

https://github.com/electrified/rc2014-ym2149/tree/4b8af5396633bc87178b81087cec0f71b8307908

https://z80kits.com/shop/ym2149-sound-card/

This can use the AY-3-8910 or the Yamaha YM2149 sound chips (and with an adapter, the AY-3-8912) . These are three channel programmable sound generators chips, as used on many 1980s computers, such as the ZX Spectrum +2, the Oric, Atari ST etc. They also have one or two 8 bit IO ports, which are used on those machines for joysticks or keyboard or printer interfaces etc.

If I remember correctly, the same silicon is inside both the 40 pin AY-3-8910 and the 28 pin AY-3-8192, and some of the additional IO lines on the 40 pin chip are simply not connected to pins on the 28 pin version. The 40 pin versions seems to be cheaper and easier to get hold of these days. The Yamaha version seems to have some improvements, and apparently many of the AY-3 chips are actually remarked Yamaha chips. (I did order some blatantly remarked / fake AY-3-8910 chips from ebay a few weeks ago, but they remain lost in the postal backlog)

There are two versions of the kit available, I chose one that comes with an additional PCB to allow you to use the 28 pin version. I wasn't planning to use this, but I thought it might come in handy one day......

Construction followed the normal practices for boards like this (other than me grumbling under my breath about having to look up component values on the bill of materials.....)

The only change I made was using turned pin sockets for the ICs. The kit with the adapter so didn't have a 40 pin socket, but I prefer turned pin types anyway. Just my preference (and what I have to hand).

I decided to start with it in the side socket on the Minstrel 4D, it's easier to see and change the jumpers if I needed to. There are an awful lot of jumpers on there, to allow different addresses and clock speeds to be used. (this is a Revision 5 board, there is a Revision 6 with a built in crystal oscillator, but this seems to be the preferred version)

I pressed the power button on the Minstrel 4D and nothing happened.

Odd.

That's not normal. The power LED didn't even come on.

Then I noticed the power supply was in current limiting. Oops. That's not right.

Ah, that might be the problem. I couldn't have picked a better pair of pins to short if I tried. Looks like 5V and 0V.

To be fair, it is rather cold in the workshop upstairs that I use for soldering and drilling and all the sort of messy stuff I don't want going on in the office below. I was going as fast as I could, and I let that solder bridge slip through.

> USE HAT

> USE COAT

> GO WORKSHOP

> USE SOLDERWICK

OK, that's better, let's try again.

It powered on this time. So let's give it a go.

There is a test program listed on George Beckett's github page:  https://github.com/markgbeckett/jupiter_ace/tree/master/rc2014_sound_card

However, there is no associated .tap file, so I will need to type it in. But fear not, this is a Minstrel 4D.

Just wire up an FTDI serial cable and go to a terminal program and paste in the text.

And the program is automagically typed in for you.

Running that program produced some nice scales from the speakers, so it sounds like it is working.

Looking at the output on the scope, there is minimal DC offset, so this is probably a genuine AY-3-8910, where the offset would be around 200mV. The Yamaha chips (and remarked Yamaha chips) will show more like 2V. This will be a good way to identify the chips from ebay, if they turn out to be functional fakes rather then just useless lumps of plastic with somewhere near 40 pins sticking out.

Next test was Valkyr, see a previous post on all the fun that was had getting that running: http://blog.tynemouthsoftware.co.uk/2022/10/valkyr-one-game-so-many-changes.html

The game originally supported the Boldfield Soundbox, which also used the AY-3-8910 chip, but with different address mapping. There is a version on George's github which has been modified to work with this card and includes the other changes to make it run smoothly on a Minstrel 4th or 4D.

https://github.com/markgbeckett/jupiter_ace/tree/master/valkyr-minstrel

On the Minstrel 4D, you can load this by browsing the SD card for the TAP file and selecting option 1, LOAD valkyr valkyr so it will automatically load and run.

Select Soundbox (EME/Boldfield) (Essex Micro Electronics designed the Soundbox for Boldfield as far as I can tell).

When the game starts you are greeted with proper game music and effects, far above what you get with the onboard beeper. Very impressive.

There are more things to test, both on the Minstrel 4D and also on a more traditional RC2014 system, look out for those in future posts. I also have the IO board to build and something exciting to test that with.


Advertisements

Minstrel 4D

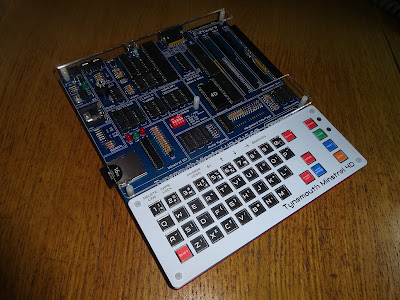
The Minstrel 4D kits are shipping now, you can order one from The Future Was 8 bit

https://www.thefuturewas8bit.com/minstrel4d.html

More info in a previous post:

http://blog.tynemouthsoftware.co.uk/2022/08/minstrel-4d-overview.html

Z80 Kits

The YM2149 Sound Card is available from Z80Kits.com

https://z80kits.com/shop/ym2149-sound-card/


Patreon

You can support me via Patreon, and get access to advance previews and behind the scenes updates. These are often in more detail than I can fit in here. This now includes access to my Patreon only Discord server for even more regular updates.

https://www.patreon.com/tynemouthsoftware
Sunday, 11 December 2022

Minstrel 4D Kits are Shipping Now

The pre-ordered Minstrel 4D kits are now shipping from The Future Was 8 bit.

It has been quite a challenge to get together all of the bits required to make lots of Minstrel 4D kits, for a while it seemed like each section of the kit was missing one key part that was stopping me packing them, but finally all the bits were sourced.

First to be completed were the key switches, key caps and covers. Here looking like a massive pile of glacier mints. All ready to be counted and weighed into bags.

And then weighed again to check they are right, before finally being counted into boxes in neat rows (or at least neat-ish).

Next were the fixings kit. I like to use a sort of pick'n'mix arrangement of parts in old Ikea bows.

Diced onion? Rice? Pasta? No, M3 nylon fixings.

Those also get counted and weighed into bags.

And weighed again and counted into rows in boxes.

The next pick'n'mix was a lot more colourful.

But the process is the same.

The resistors and diodes and axial capacitors require a different approach. These are counted out in piles.

But then back to normal as these are also weighed to check and then counted into boxes.

And after all of that, the boxes go into bigger boxes.

And finally 16Kg worth of kit bags head off the TFW8b, ready to become part of the kits.

Each kit will need seven bags of parts each.

But that's not all, what about the ICs?

Well, we managed to assemble the largest collection of microcontrollers and EPROMs that anyone could expect to see in 2022.

All of which needed to be programmed, three devices per board, an EPROM and two microcontrollers.

For the AVR chips, I used the programmer I built for the purpose. I was a bit more effort that I would have liked, but none of the production programmers I had (or could get hold of) supported the AVR Dx series of chips, so I had to build my own AVR programmer.

They also needed to be labelled, and about 10 labels in, my label printer gave up. It is USB powered, but has an internal battery for the extra umph it needs for the motor. Last time I looked, the replacement batteries were about the same price as the complete printer, so luckily past me had bought a few spares, and I still had one left.

Must get around to trying to hack some sort of battery into one of the dead ones.

With all the parts programmed and labelled, onto the logic chips.

Again, with all the shortages, who would have expected to see this many logic chips in one place. Will we ever see the like again?


Those were all counted out onto foam sheets.

As with my previous kits, I have tried to arrange the chips in the same order they go into the board, to make it easier to locate the parts.

Laying parts out on the PCB in groups looks good, but makes it a lot more difficult to do these IC packs.

Once these arrive at TFW8b towers, they can be assembled into kits.

The IC packs are wrapped up with the PCB sets.

And finally they meet up with the manual and the label sheets and perspex kit (jelly may not be included).

The manual probably deserves a post of it's own. I think this is the best manual I had done (certainly the thickest).

Full details of the assembly. Lots of colour full diagrams.

Full schematics and theory of operation.

These finally get boxed up and sent off to the new owners.

And hopefully, not too long afterwards, they should look like this:

An awful lot of time and money went into developing these kits, and a lot has been invested in sourcing the parts required to assemble all these kits. This isn't kickstarter, all the bits have to be purchased in advance by TFW8b.

I don't know if I will ever be able to do anything like this again. I hope so, but it's really at the end of the day down to whether they sell. We know it's not a great time to be asking people to buy something they can't eat or heat their homes with, but this is something of a last roll of the dice for us.


Advertisements

Minstrel 4D

The Minstrel 4D kits are shipping now, you can order one from The Future Was 8 bit

https://www.thefuturewas8bit.com/minstrel4d.html

More info in a previous post:

http://blog.tynemouthsoftware.co.uk/2022/08/minstrel-4d-overview.html

Patreon

You can support me via Patreon, and get access to advance previews and behind the scenes updates. These are often in more detail than I can fit in here. This now includes access to my Patreon only Discord server for even more regular updates.

https://www.patreon.com/tynemouthsoftware

Sunday, 4 December 2022

Loading a game from a damaged tape

This was originally at the end of another post, which has since been removed. I have split this out into a separate post as I have wanted to reference it a few times.

Just one addendum (as if this blog post wasn't already long enough). I found a game I remember I could never get to load.

It would always get to 1 block from the end, then fail.

Unfortunately, I had already tried the other side, and there was also damage to the tape and it failed even earlier. I decided to see if modern technology could save this (ignoring the easier option of buying another copy of the tape, creating one from an online copy of the game, or just loading it with an SIO2SD).

You can clearly see the damage at the start of side 1 and the end of side 2. So I did the usual cleanup and then spliced the start of side 2 with the end of side 1 and created a new wav file with the best of both copies.

I wrote this to tape and tried loading it. It got all the way to the last block...

...and then, 30 years after I got this tape, I finally got it to load.

Was it worth the wait. Probably not.

That was just a simple example, I can go into more details on the process if there is any interest in a longer post.


Patreon

You can support me via Patreon, and get access to advance previews of posts and behind the scenes updates. These are often in more detail than I can fit in here. This now includes access to my Patreon only Discord server for even more regular updates. Posts this week include previews of two new products, coming soon.

https://www.patreon.com/tynemouthsoftware